Priests, Atem and Bakura's Kul Elna Diaha (manga)
| Priests, Atem and Bakura's Kul Elna Diaha | |
|---|---|
 | |
| Game details | |
| Game | |
| Players | |
| Winner(s) | |
| Location | Shrine of the Underworld |
| Appearances | |
| Manga | |
Bakura, King of Thieves, faced Pharaoh Atem and the High Priests in a Diaha at Kul Elna.
Events[edit]
Prior[edit]
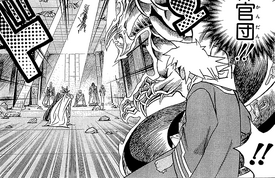
After the previous battle with Bakura, Shada and his men found Bakura's trail, which led to Kul Elna. Against Shada's advice, Atem insisted on going after Bakura, before he had a chance to strike the city again. So Shada communicated with Isis to request the High Priests come to Kul Elna to help them.[1]
Inside the Shrine of the Underworld, Bakura learned of Shada's arrival, with the Millennium Ring's ability to detect nearby Millennium Items.[1]
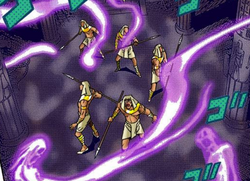
While Atem and Shada searched for Bakura, some of their soldiers found the trapdoor leading the Shrine of the Underworld. Some of them went inside, but were attacked by ghosts of the villagers. They tried to warn the pharaoh not to enter, but this alerted Bakura to the fact that Atem was still alive. Bakura invited Atem to come inside, but Shada warned him against taking action, since he could not battle without the Millennium Pendant. However Atem did want to let the soldiers die and recalled his father, Akhenamkhanen, telling him to never turn his back on what he believed is right, so he stepped inside and tried to help a soldier get up.[2]
Bakura showed Atem the Tablet of the Pharaoh's Memories and explained that the Millennium Items were forged there using shadow alchemy that involved sacrificing the lives of the men, women and children of the village. The lingering ghosts sought revenge against the royal line responsible for the items creation, so they began to attack Atem. Shada attempted to help him, but the ghosts' hatred extended to holders of the Millennium Items, so they also attacked him.[2]
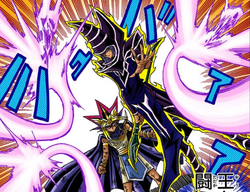
As Atem was being crushed by the hatred of the ghosts, he managed to summon the Dark Magician, Mahado, who repelled the ghosts.[2]
Atem was distraught over the truth of the Kul Elna murders and wondered if his father had made the right decision to save the kingdom. Mahado informed Atem that the massacre had taken place without Akhenamkhanen's knowledge. And when Mahado had learned the truth, he brought it before Akhenamkhanen, who grew ill from the guilt and died.[3]
Battle[edit]
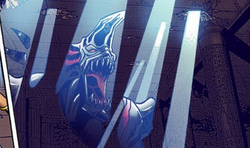
Having resisted the evil of the Millennium Ring before, Mahado had no difficulty fighting the ghosts, so Bakura brought out Diabound. Having acquired the Millennium Pendant, Bakura's Diabound was even stronger than when Atem last faced it.[3]

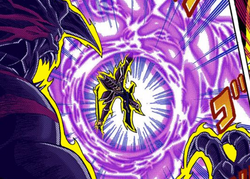
Diabound launched a "Thunder Force" attack at Mahado, who used his "Afterworld Warp" ability creating portals to absorb the attack and set its new destination. Atem reminded Mahado that Diabound could move through walls and avoid the attack, if made the target. So Mahado directed the attack at a pillar which began to fall onto the Tablet of the Pharaoh's Memories. When Bakura realized what they were doing, he got Diabound to catch the pillar. Since Diabound could not use its wall-phasing ability without dropping the pillar, it was exposed, allowing Mahado to hit it in the eye with a "Magic Blast" attack.[3] Mahado attempted to hit Diabound with a second "Magic Blast", but Diabound broke the pillar it was holding and used the fragments as a shield.[4]
Unable to fight and protect the tablet at the same time, Bakura summoned the ka, Bone Snapper, to shield the tablet.[4]
Using its "Shadow Camouflage" ability, Diabound hid itself and prepared for a stealth attack. In response, Shada summoned the Two-Headed Jackal Warrior, who was able to locate Diabound with its sharp sense of smell. The jackal warrior succeeded in exposing Diabound, but its attack was ineffective and Diabound was already about to launch a "Thunder Force" attack on Atem. Two-Headed Jackal Warrior threw itself in front of the attack, in suicide, to shield Atem long enough for Shada to push him to safety.[4]
Diabound camouflaged itself again, so Atem got Mahado to use his "Thousand Magic Blasts" attack to damage the ceiling, allowing light to shine into the shrine. The light exposed Diabound's location, allowing Mahado to hit it with a "Thousand Black Magic Blasts" attack.[4]
With Diabound weakened, Bakura got to ghosts of the Kul Elna villagers to enter his body, strengthening Diabound. Mahado attempted to hit Diabound with another "Thousand Magic Blasts" attack, but the aura of the ghosts formed a shield, which Mahado's magic could not penetrate.[5]
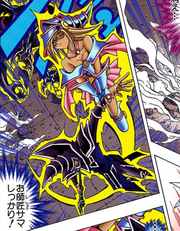
With Mahado exposed, Diabound struck him with a "Spiral Wave" attack and prepared to hit him again with "Summon Lightning Shot". Shada attempted to summon another ka to protect him, but Bone Snapper blasted him in the back, causing him to drop the Millennium Key, which Bakura then took hold of. Diabound's "Summon Lightning Shot" continued, but the Dark Magician Girl, summoned by Mana swooped in and pulled Mahado to safety.[5]
Seto, Siamun, Kalim and Isis arrived in the shrine to help, while Akhenaden, suffering from bad memories of the Kul Elna massacre, struggled to join them.[6]
Mana was not yet at the level that her ka could battle, so she had Dark Magician Girl transfer her heka to Mahado.[6]
Seto, Kalim and Isis summoned Duos, Curse of Dragon and Mystical Elf respectively and had them attack Diabound together from different directions, but Diabound remained shielded by the ghosts. Diabound then used its "Thousand Poison Fangs" attack to destroy the Mystical Elf.[6]
Duos and Curse of Dragon struggled to fight with Diabound. Kalim then used the Millennium Scales to fuse the two ka, forming Duos Dragon,[6] whose strength Mahado doubled, using his heka.[7]
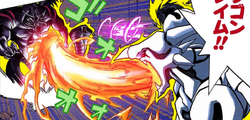
Duos Dragon used its "Dragon Flame" attack. Rather than using the ghosts as a shield, Bakura opted to fight back. Diabound launched a "Spiral Wave" attack, which hit the "Dragon Flame" head on. The two blasts pushed against each other, seemingly equal in magnitude, until Diabound's snake appendage used a "Thunder Force" attack, which merged with the "Spiral Wave", causing Diabound's attack to push Duos Dragon's back.[7]
Duos Dragon used its sword as a shield against the attack and allowed its hand to be blasted off to create an opening to hit Diabound with another "Dragon Flame". Diabound used the ghosts as a shield again, but the attack began to melt through the shield.[7]
Before Duos Dragon's attack could break through, Bone Snapper shot a blast at Kalim, causing him to drop the Millennium Scales, which the ghosts brought to Bakura. Kalim died in Atem's arms, from his injury. Without the Millennium Scales to support the fusion, Duos Dragon disappeared.[7]
The attack from Duos Dragon sufficed to burn a hole in Diabound's shield. Mahado, who had been waiting for the moment, chanting a spell, used his "Black Magic" attack through the hole, destroying Diabound.[7]
Aftermath[edit]
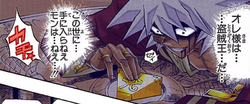
Bakura was injured from losing Diabound. He began to breakdown mentally and remained adamant that could complete the contract and kill the pharaoh. He frantically began inserting the items he had stolen into the tablet, while bragging that he was the King of Thieves. But without all seven items, he could not complete the ritual.[8]
Shadow RPG[edit]
In the Shadow RPG, this battle was replayed with events occurring largely the same as in the past.[9]
In this playing, characters deemed pawns turned to sand and disappeared, after serving their purpose. This included Kalim, after he died and Thief Bakura, shortly after losing the battle.[8]
After the battle, Dark Bakura, at the RPG table, turned an hourglass on its side, activating Zorc Necrophades' time-freezing ability,[10] immobilizing Atem and the priests. This allowed Akhenaden to take the Millennium Rod and Tauk from Seto and Isis, remove his Millennium Eye and insert the three into the tablet, with the items Bakura had already placed there.[8] With the seven items inserted, he awakened Zorc Necrophades.[10]
Ka used[edit]
| User | Ka | |
|---|---|---|
| Atem | Dark Magician | |
| Shada | Two-Headed Jackal Warrior | |
| Mana | Dark Magician Girl | |
| Seto | Duos | Duos Dragon |
| Kalim | Curse of Dragon | |
| Isis | Mystical Elf | |
| Bakura | ||
References[edit]
- ↑ a b Yu-Gi-Oh! Duel 312 (Millennium World Duel 34): "The Pharaoh Returns!"
- ↑ a b c Yu-Gi-Oh! Duel 313 (Millennium World Duel 35): "The Village of Ghosts!!"
- ↑ a b c Yu-Gi-Oh! Duel 314 (Millennium World Duel 36): "The Spirit Beast!!"
- ↑ a b c d Yu-Gi-Oh! Duel 315 (Millennium World Duel 37): "Shadow Camouflage!!"
- ↑ a b Yu-Gi-Oh! Duel 316 (Millennium World Duel 38): "Aura Shield!!"
- ↑ a b c d Yu-Gi-Oh! Duel 317 (Millennium World Duel 39): "Return of the Priests!"
- ↑ a b c d e Yu-Gi-Oh! Duel 318 (Millennium World Duel 40): "Together Against the Darkness!"
- ↑ a b c Yu-Gi-Oh! Duel 319 (Millennium World Duel 41): "The Pawns of Memory!"
- ↑ Yu-Gi-Oh! Duel 320 (Millennium World Duel 42): "The Ultimate Shadow RPG!"
- ↑ a b Yu-Gi-Oh! Duel 321 (Millennium World Duel 43): "The Dark God Awakes!"
