Priests, Atem and Bakura's city Diaha (manga)
| Priests, Atem and Bakura's city Diaha | |
|---|---|
 | |
| Game details | |
| Game | |
| Players | |
| Winner(s) | |
| Appearances | |
| Manga | |
Bakura, King of Thieves faced Pharaoh Atem and the High Priests in a Diaha, taking place in the city and its outskirts.
Events[edit]
Battle[edit]
Bakura was spotted leaving the pharaoh's palace, after his attack on Akhenaden. He attacked one of the guards and stole his horse. At the exit to the palace, Bakura was blocked by a number of guards, but Diabound quickly mutilated and incapacitated them.[1]
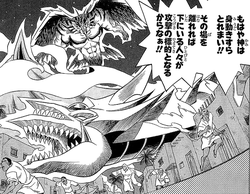
Atem then chased after Bakura on horseback and summoned Slifer the Sky Dragon from the Shrine of Wedju.[1]
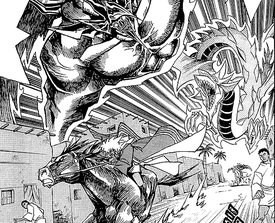
Diabound attacked Slifer with the "Magic Blast" attack, it had acquired from defeating the Magus of Illusion. Slifer evaded the attack and attempted to counterattack with "Lightning Strike", but Diabound used its wall-passing ability to disappear into the ground and chase after Atem. It emerged and attempted to attack Atem, but Slifer intervened and hit Diabound with a "Lightning Strike" attack.[2]
Knowing it was Atem's creed to protect the good of his people,[2] Bakura got Diabound to launch a "Magic Blast" attack on the people they rode past. In response, Atem got Slifer to fly within the crossfire and take the attack, in order to shield the people. With Slifer pinned in place in was vulnerable to another attack from Diabound, who prepared to launch a "Spiral Wave". Atem got Slifer to point a "Lightning Strike" attack at the ground, propelling itself back into the sky, where it quickly spun around and launched another "Lightning Strike" attack at Diabound.[3]
For the safety of the bystanders, Atem got Slifer to pull Diabound further into the sky. This also had the benefits of making Slifer's lightning attacks stronger and giving Diabound no matter to use its wall-phasing ability. Slifer launched a "Thunder Force" attack at Diabound. However Diabound used its ability to blend into its surroundings to become one with the darkness.[3]
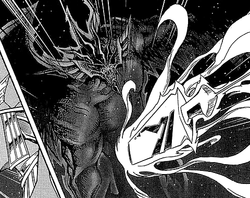
While hidden, Diabound attacked a part of the city, pressuring Atem to find it soon, before it killed more people. Diabound then approached Slifer from behind and hit it with a "Spiral Wave" attack.[3]
Bakura spoke with the Pharaoh and claimed that the blood on his hands was the will of the Millennium Items, since he could hear the thieves of Kul Elna speak from the depths of Hell within the items. He demanded that Atem give him the Millennium Pendant, threatening to kill the people of the city, if he did not comply. He quietly planned on killing Atem, regardless of which choice he made.[4]
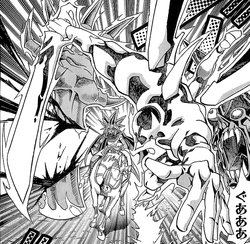
Atem composed a plan to expose Diabound and slowly removed the Millennium Pendant. While Bakura's attention was focused on the pendant, Slifer appeared above him and prepared to attack. However Diabound similarly sneaked up on Atem, while hiding in the ground. With Atem held hostage, Slifer could not move. Unable to collect all the Millennium Items, while Atem was still alive, Bakura ordered Diabound to kill Atem. However Shada, Seto and Kalim arrived just in time, with their ka, Helimai, Duos and Zerua, and Seto's Duos cut the right hand off of Diabound, saving Atem.[4]
Diabound disappeared into the darkness and Bakura vanished too. Unable to see their enemy, Seto instructed his companions to have their ka aim their attacks into the sky. While hidden, Diabound attacked and destroyed Shada's ka, Zerua.[4] Seto demanded that Shada not give up and that they keep fighting until their last ounce of ba.[5]
Seto ordered the cavalry to follow Bakura and the guard to evacuate the city and open the palace to refugees.[5]
With Diabound wounded from Duos attack, Kalim suspected the range of its "Spiral Wave" attack would be shortened and that they could utilize that information to determine its location. He proposed that he use his ka as a decoy to lure Diabound into attacking and once it was exposed, everyone else would attack. Seto agreed and hoped to hit Diabound with Duos' aura sword, which would mark its position.[5]
While Kalim and Seto prepared to conduct their attack, Shada was asked to protect the pharaoh. With Slifer badly injured by Bakura's attacks and Atem not looking well, Shada warned Atem that he was putting himself in danger by continuing to fight. Shada pleaded with him to return to the palace and leave the fight to the priests. However Atem was adamant that it was his duty as pharaoh to fight until the end.[5]
Atem aided Seto and Kalim in their attack, by using Slifer as the decoy. Diabound struck Slifer with a "Spiral Wave", destroying it and reducing Atem's ba. With Diabound's position exposed, Duos threw its "Aura Sword" in its direction. However Bakura had anticipated the attack. Since he had a Millennium Item, he was able to summon ka from the Shrine of Wedju and had previously summoned Illushu, which he used a decoy to take the hit from Duo's attack. Since it was a weak ka, he did not lose much ba in doing so.[5]
Diabound attacked and destroyed Kalim's ka, Helimai. Atem knew that priests' ka would all be destroyed at this rate and although he was almost out of ba, decided that he must go after Bakura, believing it to be the only way to stop the killings.[6] Shada saw that the pharaoh was putting himself in danger, so he and some soldiers chased after him.[7]
With the Millennium Ring, Bakura could see that Atem was coming for him and the two met on a mountain. Bakura was aware that Atem was low on ba and incapable of summoning more ka. He got Diabound to crumble the earth below Atem, leaving him hang from a chasm. Bakura then took the Millennium Pendant from Atem and allowed him to fall.[7]
Aftermath[edit]
Atem survived the fall and was met by Hasan when he woke up. Hasan advised him to rest and warned him that a great battle was coming.[8]
Shada and his men succeeded in finding Bakura's trail, which led to Kul Elna. Isis found Atem, using her ka, Spiria, and led Shada to his location. When they informed Atem of Bakura's location, he refused to return to the palace, without the Millennium Pendant. Against Shada's advice, he insisted on going after Bakura before he had a chance to strike the city again. Through Spiria they asked Isis to send the other High Priests to Kul Elna to help them.[9]
Shadow RPG[edit]
When Atem played the Shadow RPG, he reenacted moments of his life as pharaoh, including this battle. His friends, Yugi Mutou, Katsuya Jonouchi, Anzu Mazaki and Hiroto Honda also took part in the game, as extra characters.[10]
When Atem chased Bakura out of the palace, Yugi, Jonouchi, Anzu, Honda and Bobasa spotted him and recognized him as Dark Yugi, but he was moving too quickly to notice them.[2] The group went after Atem and caught up with him just after Slifer was defeated. Yugi shared his strength with Atem, replenishing his ba gauge, allowing him to summon The Sun Dragon Ra.[5]
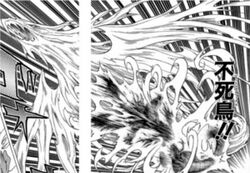
The light from Ra, the god of the sun, lit up the sky and exposed Diabound. Diabound attacked Ra with the "Thunder Force" attack it had gained in defeating Slifer, but Duos managed to deflect the attack with an "Aura Sword" blast. Ra then transformed into God Phoenix and attacked Diabound, destroying it.[11] The toll it took on Bakura's ba killed him.[12]
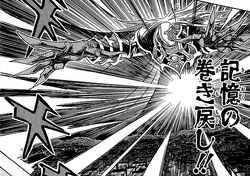
Dark Bakura was not happy with the interference, since he knew that Thief Bakura had originally been the one to win the fight. He reported the incident to the Zorc Necrophades, who had entered the World of Memories.[12] At the RPG table, Dark Bakura played an hourglass, allowing him to use one of Zorc's time manipulation powers.[13] Zorc, in the form of the High Priest of Darkness, appeared in the sky and introduced himself to Atem, before using his "Memory Reverse" ability to undo the recent events, including the defeat of Diabound and Thief Bakura.[12]
After witnessing Slifer being destroyed again after the time reversal, Yugi and his friends rushed to help Atem, but were stopped by Dark Bakura this time.[6] Dark Bakura made clear his motives to aid Zorc and challenged them to a Shadow Game of Duel Monsters, in which the loser would die. Jonouchi Dueled him first, but was almost lost immediately. He was saved as the world plunged into darkness when Atem fell into the chasm.[7]
Ka used[edit]
| User | Ka |
|---|---|
| Atem | |
| Seto | Duos |
| Shada | Zerua |
| Kalim | Helimai |
| Bakura |
References[edit]
- ↑ a b Yu-Gi-Oh! Duel 299 (Millennium World Duel 21): "Assault on the Palace!"
- ↑ a b c Yu-Gi-Oh! Duel 300 (Millennium World Duel 22): "Slifer vs. Diabound"
- ↑ a b c Yu-Gi-Oh! Duel 301 (Millennium World Duel 23): "Divine Light, Divine Shadow"
- ↑ a b c Yu-Gi-Oh! Duel 302 (Millennium World Duel 24): "Surprise Attack! Power Attack!"
- ↑ a b c d e f Yu-Gi-Oh! Duel 303 (Millennium World Duel 25): "To Pierce the Darkness!"
- ↑ a b Yu-Gi-Oh! Duel 306 (Millennium World Duel 28): "Time Rewound!!"
- ↑ a b c Yu-Gi-Oh! Duel 307 (Millennium World Duel 29): "Shadows Fall!!"
- ↑ Yu-Gi-Oh! Duel 311 (Millennium World Duel 33): "The Vessel of the White Dragon"
- ↑ Yu-Gi-Oh! Duel 312 (Millennium World Duel 34): "The Pharaoh Returns!"
- ↑ Yu-Gi-Oh! Duel 320 (Millennium World Duel 42): "The Ultimate Shadow RPG!"
- ↑ Yu-Gi-Oh! Duel 304 (Millennium World Duel 26): "The Summoning of Ra!"
- ↑ a b c Yu-Gi-Oh! Duel 305 (Millennium World Duel 27): "Ruler of Shadows!!"
- ↑ Yu-Gi-Oh! Duel 321 (Millennium World Duel 43): "The Dark God Awakes!"
