Millennium Puzzle (manga)
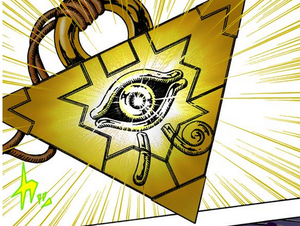
The Millennium Puzzle (
The item was originally known as the Millennium Pendant, or Millennium Pyramid (
This is the original depiction of the Millennium Puzzle.
Contents
Events
Ancient Egypt
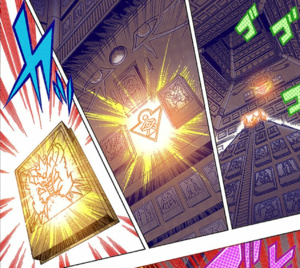
The Millennium Tome was a book containing forms of magic, including spells capable of summoning gods and demons, heka capable of defeating armies, and shadow alchemy. The book was passed down by High Priests since ancient times. When Akhenamkhanen was Pharaoh, his kingdom's Priests had spent a hundred years working on translating its text. By that time foreign armies had heard of the Tome and started an invasion to claim its power. Akhenamkhanen's brother, Akhenaden finished the translation and made preparations to conduct the shadow alchemy to create seven powerful treasures. He then pleaded with Akhenamkhanen to sanction their creation in order to fend off the invaders, who were days away from storming the palace, and Akhenamkhanen reluctantly accepted.[2]
Akhenaden deliberately neglected to tell Akhenamkhanen that the shadow alchemy had a cost of ninety nine human lives, knowing he would not approve. Akhenaden, along with three magicians and a number of soldiers went to Kul Elna, which had a reputation as being a village of thieves. They killed a number of villagers to turn base substances into gold, which was forged into the Millennium Items in the tablet. The conspirators returned to the palace and six of the Millennium Items were given to Priests, while the Millennium Pendant was given to the Pharaoh, Akhenamkhanen.[2]
Seven days later, the foreign armies arrived at the palace. The Pharaoh and Priests used the Millennium Items to summon ka that easily defeated the invaders.[2]
In ancient Egypt pyramids were built shaped life a solidified beam of light pointing towards the sun, as a monument to the Pharaoh's power. However one day a man who worshipped darkness rather than light came to power and a war took place. The court magicians created seven Millennium Items to seal the darkness away. One of them was the Millennium Pendant, shaped like a reverse pyramid, considered to be a symbol of darkness.[3]
An image of the Millennium Pendant was carved into the Shrine of Wedju,[4] between the slabs for the three hidden gods, whose names were a mystery believed to one day be passed on to Pharaoh with the power to wield them.[5]
Atem came to possess the Millennium Pendant. During a Diaha against Bakura, King of Thieves, Atem carried his father's corpse and felt a reaction from the Puzzle, causing him to hear his father say "justice is in the name of the Gods". The Puzzle reacted once again as he called the name "Obelisk", summoning The God of the Obelisk from the Shrine of Wedju.[4]
In a mock Diaha against Seto, Atem used the Millennium Pendant to summon Kuriboh from a stone slab.[6]
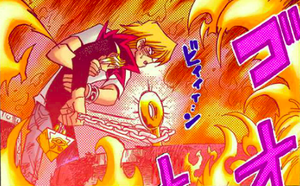
In another battle with Bakura, Atem used the Millennium Pendant to summon Slifer the Sky Dragon from a slab in the Shrine of Wedju.[7] However Bakura threatened to destroy the city and take innocent lives unless Atem handed him the Pendant. Atem pretended to comply and held up the Pendant to distract Bakura, while lining up Slifer the Sky Dragon to attack him.[1] The battle still ended in Atem's defeat[8] and Bakura took the Pendant from him before he fell down a chasm.[9]
Akhenaden acquired all the Millennium Items and placed them in a tablet, as part of a dark pact to gain power. He became the High Priest of Shadows and waged war with Atem.[8]
During the war, Atem had another Diaha against Seto. Atem used the Pendant to Summon Dark Magician from a tablet. Seto warned him that the Millennium Items were useless against his power of darkness.[10]
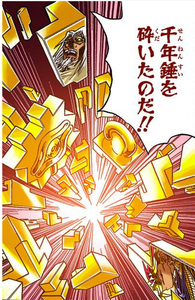
The war ended when Atem gave his life to seal his soul in the Millennium Pendant, taking the High Priest of the Shadows' soul with him. This caused the Pendant to be broken into pieces, resembling a puzzle.[8]
It was written in the Book of the Dead that the Items were made by magicians serving the Pharaohs in order to punish thieves who would defile the tombs of the Pharaohs.[11] and that whoever solves the Millennium Puzzle would inherit the Shadow Games, become the guardian of right and pass judgment on evil.[12]
The Millennium Puzzle, similar to some of the other Items, came to house a soul from the past and functioned as a portable tomb.[13]
The memories of the Pharaoh were hidden inside the Puzzle. Bringing the six other Items together with it would break the seal and restore his memories, a duty which was to fall upon the person capable of solving the Millennium Puzzle. A warning was inscribed on the Memory Tablet in Kul Elna:[14]
The young Pharaoh and the six High Priests gave their lives to seal the evil power inside the holy door.
I pray the evil power is not resurrected along with the Pharaoh's memories.[14]
A prophecy handed down through generations of Tomb Guardians said that an evil power was sealed in the darkness of the Puzzle along with the soul of a young King, but after thousands of years of slumber, the evil power will rise again and when that happens the King's spirit will awaken and wander the world seeking the memories he had forgotten.[3]
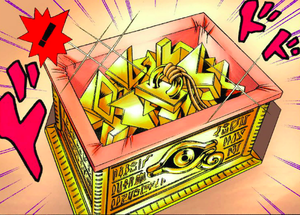
The Millennium Puzzle was placed inside a box. According to Yugi Mutou, the hieroglyphics etched into the box read "whoever solves this puzzle shall be granted one wish". According to Sugoroku Mutou, they said "the one who solves me shall gain the powers of knowledge and darkness".[12]
The one who solved the Millennium Puzzle was said to inherit the will of the Pharaoh and be tested endlessly.[15]
Excavation
The Millennium Puzzle was found at the beginning of the twentieth century in the Valley of the Kings. A British archaeological team removed it from the Pharaoh's crypt. However, everyone on the team died a mysterious death with the last one uttering "the Shadow Games" in his dying breath.[12][16]
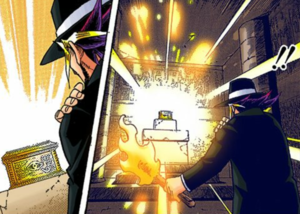
Sugoroku Mutou heard a legend of a hidden game room in the most dangerous tomb in history in the Valley of the Kings. And that untold honor and a puzzle that no one has solved awaits the one who conquers it. In the 1960s, Sugoroku accompanied by the graverobbers, Ahmet and Mushura, ventured to the tomb to retrieve the Millennium Puzzle. Sugoroku used his knowledge of gaming and Egyptian culture co lead them past the traps. Towards the end, Ahmet shot Sugoroku in an attempt to claim the treasure for himself, but was then consumed by a demon ka dwelling in a slab. The wounded Sugoroku was saved by an apparition of Atem, who mistook him for Siamun Muran. Sugoroku then made it to the room containing the disassembled Millennium Puzzle and was able to take it from the tomb.[16]
Devil's Board Game
Mr. Otogi aspired to be a master of games like Sugoroku Mutou and became his apprentice to learn more. One day, Sugoroku told Otogi about the Millennium Puzzle and Otogi later faced him in the Devil's Board Game in the hopes of winning the Puzzle. Otogi lost the game,[17] causing him to age fifty years in a single night[14] and his face to become disfigured.[17]
About four years later, Otogi had a son, Ryuji, born specifically for him to extract his revenge.[14] For sixteen years, he groomed Ryuji to be a gamer capable of enacting it. Ryuji was taught that the one who solved the Millennium Puzzle would be given the title of "King of Games". He was fine with pursuing his father's revenge as he also grew fond of the Puzzle himself and hoped to obtain its power.[17]
Yugi's completion
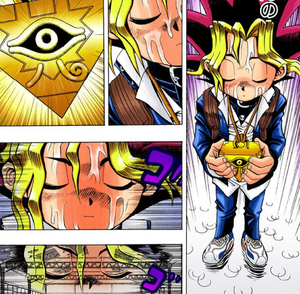
Sugoroku left the Millennium Puzzle on a shelf in his family's game store, Kame Game. It was later found by his grandson, Yugi Mutou, who regarded the Puzzle as his greatest treasure and spent the next eight years trying to solve it and always carried it around in its box.[12]
One day while Yugi was sitting alone at school with the Puzzle, Hiroto Honda snatched it from him and tossed it to Katsuya Jonouchi as the two of them taunted Yugi. Jonouchi secretly swiped the center piece of the Puzzle from the box before throwing it back to Honda. However Anzu Mazaki arrived and caught the box before Honda. She returned the Puzzle to Yugi and told the others to leave him alone. Without Yugi's knowledge, Jonouchi threw the piece of the puzzle he took into the school's swimming pool.[12]
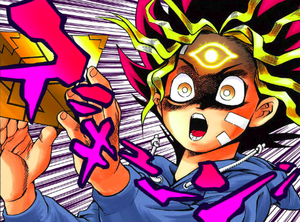
Ushio declared himself to be Yugi's bodyguard and beat up Jonouchi and Honda. Despite Yugi insisting he did not want that and defending Jonouchi and Honda, Ushio imposed a bodyguard fee of ¥200,000 (about US$1800 at the time) and beat up Yugi as a warning should he not pay. Moved by Yugi defending him, Jonouchi recovered the piece of the puzzle he threw into the pool. He returned it to Sugoroku later that day and told him what Ushio was doing to Yugi. While thinking of what to do about the fees, Yugi found himself compelled to work on the Millennium Puzzle, finding it much easier to solve than previous attempts. He got to the point where the only piece left was the one Jonouchi who had taken and panicked on realizing it was missing. However Sugoroku returned the piece to him and secretly slipped money for the fees into Yugi's bag. Knowing the person who solves the Millennium Puzzle gets the power to pass judgment on evil, he suspected Ushio would be the one getting into trouble.[12]
Yugi's completion of the Millennium Puzzle caused Dark Yugi,[12] the soul of Atem stripped of his memories to emerge,[18] with the ability to take control of Yugi's body for what Yugi would see as moments of memory loss. Dark Yugi then confronted Ushio and proposed they play the Money and Knife Shadow Game for double the money Ushio had demanded. Ushio's attempt to cheat resulted in him suffering a Penalty Game.[12]
Yugi believed solving the Puzzle would grant a wish and had earlier wished for friends. The events that took place in the lead up to his completion of the Puzzle caused Jonouchi to become Yugi's friend, which Yugi regarded as the fulfilment of the wish.[12]
School
Yugi usually wore the Millennium Puzzle on a string around his neck. Dark Yugi on numerous occasions took over his body to deal justice on people who wronged Yugi or his friends by defeating them in Shadow Games and subjecting them to Penalty Games. Such opponents included the ZTV director,[19] Sozoji,[20] the escaped prisoner,[21] Kokurano,[22] Goro Inogashira,[23] Ms. Chono,[24], the Junky Scorpion owner,[25] and Seto Kaiba,[26]
In the game with the ZTV director, Dark Yugi made use of the Millennium Puzzle to block a die that the director threw at his face. This broke the die in two, causing it to land on both 1 and 6, which totaled 7. Since the player with the lowest roll won, this caused the director to lose.[19]
Yugi feared that Jonouchi was in trouble having seen him with Hirutani's gang. He turned to the Millennium Puzzle and asked it to help him find Jonouchi. This gave him a vision of a warehouse, Hirutani's "torture chamber", where Dark Yugi then went to face the gang in the Landmine Search Network Shadow Game. Dark Yugi made use of the Puzzle as a prop in this game, where he hung it from a chain over an unconscious gangster's forehead. Rainwater tricked down the chain and off of the apex of the Puzzle onto the gangster's forehead, causing him to wake up and release his arm from a switch. This made him drop his stun gun into a puddle of water, electrocuting the gang.[27]
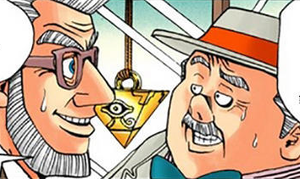
The Egypt Unearthed exhibition at Domino Museum was hosted by Curator Kanekura and Professor Yoshimori. Knowing Yoshimori was a friend of Sugoroku Mutou, Kanekura pleaded with him for an introduction to Sugoroku and Yugi to ask to have the Millennium Puzzle included in the exhibit. Yugi was concerned about parting with it, but allowed him to take it for a day. Yugi and his friends got their photo taken with the Puzzle on display, while Kanekura secretly made dealings with a buyer for the Puzzle. He hoped giving Yugi a small share of the large sum he expected to receive would be enough to silence him. However Kanekura was put on trial by Weighing of the Heart by Shadi for his defilement of a tomb and subsequently killed. Shadi then discovered the Millennium Puzzle on his desk.[28]
Shadi recognized Yugi as the person who solved the Millennium Puzzle and decided to test the power of the Puzzle. He used his Millennium Key to enter Yugi's soul room,[28] where he was defeated by Dark Yugi in the Labyrinth Treasure Hunt Shadow Game, but was ultimately granted mercy. Shadi then returned the Puzzle to Yugi, but was surprised to find he was unaware of Dark Yugi's existence.[11]
Shadi also prepared to pass judgment on Professor Yoshimori, but on discovering that he was expecting a visit from Yugi, opted to keep him alive to use him to try again to test the powers of the Millennium Puzzle.[29] He redecorated the souls of Yoshimori and Anzu to use as puppets in his Trial of the Mind Shadow Game for Dark Yugi.[30][31]
One stage of the Trial of the Mind, the Game of Death, used the Millennium Puzzle as a prop. Dark Yugi and an illusion of Jonouchi with his old bullysome personality faced each other in a game where they took turns throwing the Puzzle to make their opponent walking in the direction the Puzzle landed pointing.[32]
Mokuba Kaiba and his followers coerced Yugi into facing Mokuba in a rigged game of Capsule Monster Chess. One of the followers attempted to take the Puzzle from Yugi, but this caused Dark Yugi to emerge, which Mokuba had hoped for as he wanted to defeat that Yugi in revenge for the Penalty Game he inflicted on his brother, Seto Kaiba.[33]
Street Fighter grew frustrated over repeatedly losing to Yugi in the Virtual VS arcade game, so he attacked him in person and stole the Millennium Puzzle from him. Jonouchi tracked him down and defeated him the so-called "Game of Death", taking back the Puzzle for Yugi.[34]
Death-T
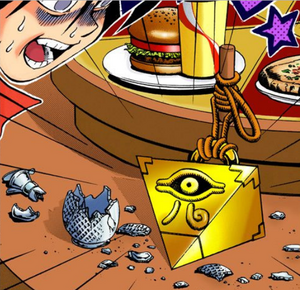
Mokuba Kaiba faced Yugi and Jonouchi in his Russian Roulette Dinner game. However Dark Yugi realized Mokuba had rigged the game by using a switch hidden in a syrup bottle. So Dark Yugi attached the Puzzle to the rotating table, causing it to smash the bottle as it was spun around.[35]
Towards the end of Death T-2, when Jonouchi faced the Chopman in a deathmatch, Yugi turned to the Puzzle while trying to think of what to do. This gave him the idea on how Jonouchi could use a candlestick to win. Jonouchi used the candlestick's holder to pick the lock on his handcuff and then attached the cuff to the locked door, while slotting the candle inside. When the Chopman yanked on the chain, he pulled open the door and knocked the candle into the oil he was standing in, causing him to burn to death.[36]
After Death T-3, Yugi confessed to Jonouchi and Anzu that he believed that since he solved the Millennium Puzzle, there was another Yugi inside of him who would sometimes take control. Shortly afterwards, he switched to Dark Yugi for the remaining stages.[37]
Monster World
Now knowingly aware of Dark Yugi's existence, Yugi continued to switch to him by the power of the Millennium Puzzle to deal justice on people who wronged him and his friends, including Tsuruoka,[38] the ZTV producer,[39] Koji Nagumo,[40] and the Playing Card Bomber.[41]
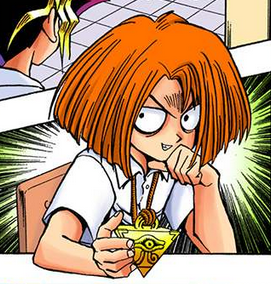
Yugi's classmate, Imori, learned about the Millennium Puzzle in a book about ancient Egypt and read "the one who solves the Millennium Puzzle shall gain the thousand ways of the Shadow Games and become the guardian of darkness". He recognized the Puzzle as the item Yugi belonging to Yugi and coped that Yugi used to be bullied a lot, up until he solved the Puzzle. He suspected he must have gained the powers of darkness and somewhat looked up to him. However he swore to defeat him and take his place as guardian of darkness.[42]
While Yugi was swimming in gym class, Imori stole the Millennium Puzzle from his locker and left a note instructing him to meet him in room C alone. When Yugi arrived, Imori was wearing the Puzzle and proceeded to tell Yugi what he knew about it. He produced the Dragon Cards and said that Yugi must defeat him in a Shadow Game using them in order to win it back. Since Yugi was not in contact with the Puzzle, he could not switch to Dark Yugi for the game. Yugi lost the game and had his soul sucked into the soul-eating jar. However he managed to grab onto the Millennium Puzzle as he collapsed, allowing Dark Yugi to emerge.[42] Dark Yugi challenged Imori to a second game and Imori accepted, figuring he would need to defeat Dark Yugi in order to gain the power of the Puzzle. This time Dark Yugi won, reclaiming the Puzzle and recovering Yugi's soul.[43]
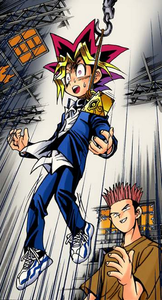
Yugi and Jonouchi ended up in a conflict with Hirutani and his gang in their "torture chamber". One of Hirutani's minions attached a hook hanging from the ceiling to the Millennium Puzzle, while it was around Yugi's neck and had the hook lift him off of the ground. Jonouchi managed to get Yugi down, while being battered by the gang swinging their yo-yos.[44] Jonouchi then borrowed the Puzzle and spun it around on its rope, catching all of the gangsters' yo-yos on the rope. He removed the yo-yos from the rope and attached them to the hook, hanging the gangsters by their fingers. He returned the Puzzle to Yugi, who switched to Dark Yugi to help deal with the gang.[45]
Ryo Bakura transferred to Domino High School and befriended Yugi. He was fascinated by the Millennium Puzzle, due to its similarity to the Millennium Ring he secretly possessed. He inspected the Puzzle, but continued to feel chest pains for a while after touching it. The two Millennium Items coming into close proximity caused a resonance, which allowed Dark Bakura, the spirit of the Millennium Ring to communicate with his host, Bakura. Among other things, he informed Bakura of his intention to steal the Millennium Puzzle.[13]
Yugi, Jonouchi, Anzu, and Honda went to Bakura's apartment to play Monster World with Bakura. Unbeknownst to them, Dark Bakura took control of Bakura's body in order to make the game a Shadow Game for the ownership of the Puzzle.[13]
Duelist Kingdom
Maximillion J. Pegasus used his videotape to face Yugi in a game of Duel Monsters. Upon realizing it was a Shadow Game, Dark Yugi used the Millennium Puzzle to take control and continue the Duel for Yugi.[46]
Yugi used the Millennium Puzzle to switch to Dark Yugi for his Duels throughout the Duelist Kingdom tournament.
Jonouchi was ambushed by Bandit Keith's underlings. While his friends searched for him, Dark Yugi held onto the Puzzle and concentrated. This showed him a vision of Jonouchi located in a underground cavern.[47]
Dark Yugi struggled in the Duel with Pegasus at the end of the tournament, due to Pegasus reading his mind with the Millennium Eye. Yugi then found a way to communicate with Dark Yugi from within their soul room. He proposed the "Mind Shuffle" strategy where they use the Millennium Puzzle to switch which of them was in control of their body just as Pegasus was about to read their mind. This enabled each Yugi to take a turn setting up a move, then switch to the opposite Yugi, who would be unaware of what had been set up, making him incapable of leaking it to Pegasus. With this, they defeated Pegasus Toon strategy.[48] Pegasus then recognized Yugi as being a worthy holder of a Millennium Item and thought a Shadow Game was more befitting. The nature of the Shadow Game caused Yugi to collapse,[49] preventing the Mind Shuffle from being used any further.[50]
On his defeat, Pegasus recognized the housing of two souls in one body as the power of the Millennium Puzzle and asked Dark Yugi if he was aware the Millennium Items contained an evil intelligence.[51] Anzu theorized that Dark Yugi not subjecting Pegasus to a Penalty Game was because he came from the Puzzle and did not want to accept that he was evil.[52]
Dungeon Dice Monsters
Ryuji Otogi became aware of Sugoroku's grandson solving the Millennium Puzzle and defeating numerous powerful enemies with its power. He prepared a game to defeat Yugi in for the ownership of the Puzzle and arranged for the Puzzle to be taken from Yugi beforehand, so he could test Yugi's true abilities.[17]
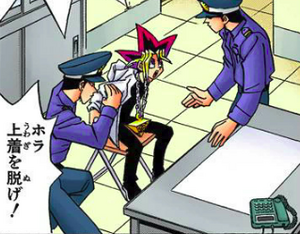
At the opening for the Black Clown, Otogi's father, then known as Mr. Clown, planted some packs of Dungeon Dice Monsters on Yugi to frame him for shoplifting. Security brought Yugi to an office and confiscated the Millennium Puzzle. Yugi was then brought to another room to play Dungeon Dice Monsters against Ryuji Otogi.[53] Yugi asked Ryuji to promise to return the Puzzle if he won. Without the Puzzle, he had to play without assistance from Dark Yugi, which Ryuji initially believed made him an incapable gamer.[54]
Ryuji took an early lead, but as the game became more evenly matched, his respect for Yugi grew. Mr. Clown grew frustrated by Ryuji struggling. He entered the room, carrying the Millennium Puzzle, and forbade Ryuji from losing. Ryuji pleaded with his father to not interfere, but Clown was determined to break Yugi's fighting spirit, so he dismantled the Puzzle, confident Ryuji would be able to reassemble it.[55] However Ryuji snatched the remainder of the Puzzle from him and apologetically returned the pieces to Yugi. Regardless, he insisted that the Puzzle would still go to the winner of their game.[56]
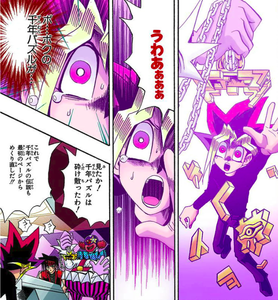
Outside the Black Clown, Dark Bakura's Millennium Ring began to react, which he understood to mean something had happened to the Millennium Puzzle.[55] Since the Millennium Ring and Puzzle contained memories destined to be reunited and Yugi was the only host chosen by the Puzzle in the past 3000 years, Dark Bakura needed Yugi to remain its wielder, so he sought to help him.[56]
Ryuji believed he was about to win the Millennium Puzzle, but Dark Bakura entered the room and laughed, calling him unworthy. He advised Ryuji against even trying to use the Puzzle, as it would result in him suffering a horrible death. Dark Bakura examined the game and predicted Yugi, as chosen host of the Puzzle would turn the tables over the next few turns.[56] Clown handed the Puzzle to Ryuji when it looked like he was about to win. Despite Dark Bakura's advise, he tried solving it, but found the pieces simply would not connect.[57] Yugi doubted his own ability to win the game, but Dark Bakura ordered him to focus and insisted this was the King's challenge to see if he was the true successor of the Millennium Puzzle. Yugi was confused by what he meant by "King" and Dark Bakura explained that as the only one capable of solving the Puzzle, it was Yugi's duty to awaken the King's memories.[58]
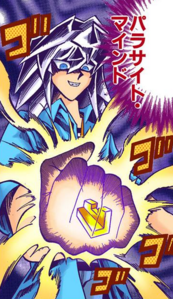
Yugi won the game and told Ryuji that his victory was not out of a desire to have the power of the Millennium Puzzle, but rather to see his other self again.[58] He vowed to solve the Puzzle again, no matter how long it took. Dark Bakura secretly used his "Parasite Mind" ability to seal a portion of his soul in a piece of the Puzzle, before handing it to Yugi.[14]
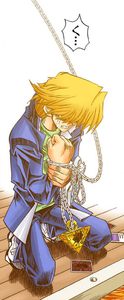
Ryuji apologized to his father for not getting revenge and found himself unable to hate Yugi. Mr. Clown feigned remorse for long enough to put the Millennium Puzzle's chain around Yugi's neck. He then disowned Ryuji as a son and dragged Yugi into another room, taking the Puzzle with them. He nailed the Puzzle's chain to a table on which he planned to face Yugi in the Devil's Board Game. However he began trying to solve the Puzzle, which caused him to hallucinate being trapped in a maze. This led to him knocking over a candle and starting a fire.[14]
Yugi could not remove the Millennium Puzzle from the table it had been nailed to and feared it would be melted if he left it behind. So he resolved to complete the Puzzle in the middle of the fire to see Dark Yugi one more time. He solved the Puzzle much more quickly this time, finishing it just before falling unconscious. Jonouchi tried to carry him out of the room, but could not get him to let go of the Puzzle. Jonouchi then slotted a finger pointing from the Devil's Board Game into the loop on top of the nail and used the board as a lever to help pull the nail out, allowing him to save both Yugi and the Puzzle.[59]
Battle City
While Yugi recovered in the hospital from his burns at the Black Clown fire, Anzu reminded him that he made a wish the first time he solved the Millennium Puzzle and asked what he wished for this time. The thought of a wish had not crossed his mind in his haste, but he considered his desire to see the other Yugi again might have counted as his wish. Anzu said that if the Puzzle had a mind, it would have known Yugi wanted to see Dark Yugi again, but then became afraid of the implications of what she said. She had wanted to believe Dark Yugi to be an extension of Yugi's personality brought out by the Puzzle, but was now beginning to believe Dark Yugi came from the Puzzle and feared that he might leave when the Millennium Items were eventually returned to Egypt.[60]
A patient in the same ward as Yugi showed him an advert in his newspaper for The Art of Egypt exhibition at Domino City Museum and pointed to a picture of Ishizu Ishtar wearing the Millennium Tauk, commenting on how similar the Tauk was to Yugi's Puzzle.[60]
Dark Yugi began to question where he came from. He only knew that he was able to exist when Yugi wore the Millennium Puzzle and wondered if he going to the Memory Tablet in Egypt would provide answers. However he assured Yugi that he wanted to stay with him, even if it meant never recovering his memories.[61]
Dark Yugi and Anzu together went to The Art of Egypt exhibition for a clue to his past.[62] On the 3000-year old Tablet of Lost Memories, they saw a depiction of a Pharaoh, who looked just like Dark Yugi, wearing the Millennium Puzzle and concluded Dark Yugi must be that Pharaoh.[18]
For much of the Battle City tournament, Dark Yugi assumed control of Yugi's body and won Duels on his behalf.
When Marik Ishtar used the Millennium Rod to brainwash Jonouchi and force him to Duel Dark Yugi, in a Duel where the loser would be dragged by an anchor into the ocean, Yugi felt it was his turn to help Jonouchi and offered to Duel instead. Dark Yugi hesitantly accepted,[63] but tried to take back control when the Duel got too dangerous. However Yugi removed the Puzzle to stop him doing so.[64] He trusted Jonouchi to not let him die and felt he needed to become stronger without Dark Yugi's protection.[65]
Yugi was unable to bring himself to cause Jonouchi's death and prepared for his own loss and placed the Millennium Puzzle around Jonouchi's neck, not wanting it to sink to the bottom of the bay. Marik ordered Jonouchi to take apart the Puzzle and throw the pieces into the ocean. However Jonouchi was reminded of when he threw a piece of the Puzzle into water before and the events that followed, which led to him becoming Yugi's friend. He disobeyed Marik's order to throw away the pieces, but still continued the Duel.[66]
At the climax of the Duel, Yugi succeeded in snapping Jonouchi out of Marik's brainwashing and Jonouchi removed the Millennium Puzzle before they both got dragged underwater. Having gained access to both handcuff keys, they were both saved and Jonouchi returned the Puzzle to Yugi afterwards.[67]
Dark Yugi faced Dark Bakura in the Battle City quarterfinals and asked if he was after the Millennium Puzzle again. However it was in Dark Bakura's interests for Yugi to hold onto the Puzzle until he could open the "dark door". Instead he claimed to be after Yugi's God card, not disclosing he intended to give it to Marik in exchange for the Millennium Rod.[68]
In fulfilment of her Tomb Guardian duties, Ishizu gave the Millennium Tauk to Yugi. Afterwards Anzu asked her what would happen to Dark Yugi when the seven Millennium Items are fitted into the slab in the temple in Egypt. Ishizu replied that all mortal souls have a place to return to, his included.[69]
The night before the finals, Yugi touched the Millennium Puzzle and entered Dark Yugi's soul room for the first time. Inside Dark Yugi told him about Shadi searching for his "true soul room", which even he did not know the location of.[70]
The God cards colliding in Dark Yugi and Kaiba's semifinal caused the Millennium Puzzle and Rod to react and reveal memories hidden within them; Dark Yugi and Kaiba were shown a vision of the Diaha between Atem and Seto.[10]
King's Memories
Dark Yugi and his friends went to Domino City Museum to present the God cards to the Tablet of the Pharaoh's Memories. Outside the museum, they were approached by Bobasa, who had slots in his clothing for each Millennium Item, including the Puzzle. (In earlier printings, the slots were in his skin.)[71] He said that he would aid Dark Yugi on his journey to the World of Memories and after earning his trust, he would act as a human safe for the Items, by locking his clothing and swallowing the key, which he could regurgitate. Dark Yugi pointed out that even if he did believe him, he could not hand over the Puzzle.[72]
Upon brandishing the God cards to the tablet, Dark Yugi was transported to the World of Memories[73], which existed within the Millennium Puzzle.[8] Despite this, Yugi began to panic as he could no longer sense any trace of Dark Yugi in his heart or the Millennium Puzzle.[73]
History of possession
| Holder | Means of acquisition |
|---|---|
| Akhenamkhanen | Created for, to protect his kingdom |
| Atem | Inherited from his late father |
| Bakura, King of Thieves | Stole |
| Atem | Regained from Bakura |
| Sugoroku Mutou | Recovered from Atem's tomb |
| Yugi Mutou | Found in his family's game shop |
| Curator Kanekura | Lent to |
| Shadi Shin | Safe kept after killing Kanekura |
| Yugi Mutou | Returned to from Shadi |
| Street Fighter | Stole |
| Katsuya Jonouchi | Retrieved |
| Yugi Mutou | Returned to from Jonouchi |
| Imori | Stole |
| Yugi Mutou | Recovered |
| Katsuya Jonouchi | Lent to |
| Yugi Mutou | Returned to |
| Atem | Used in the Shadow RPG |
| Bakura, King of Thieves | Stole |
| Atem | Retrieved |
| Yugi Mutou | Returned to the Memory Tablet, where it was dismantled and sealed away |
| Seto Kaiba | Excavated |
| Seto Kaiba | Aigami steals two pieces from Kaiba |
| Aigami | |
| Seto Kaiba | Aigami gives a piece to Sera |
| Aigami | |
| Sera | |
| Seto Kaiba | Sera gives her piece to Yugi |
| Aigami | |
| Yugi Mutou | |
| Seto Kaiba | Yugi wins a piece from Aigami |
| Yugi Mutou | |
| Seto Kaiba | Yugi completes the puzzle for Kaiba, to show Atem is not inside |
| Yugi Mutou | Kaiba gives Yugi the puzzle to summon Atem |
| Atem | Takes the puzzle with him as he returns to the afterlife |
References
- ↑ a b Yu-Gi-Oh! Duel 302 (Millennium World Duel 24): "Surprise Attack! Power Attack!"
- ↑ a b c Yu-Gi-Oh! Duel 308 (Millennium World Duel 30): "The Birth of the Millennium Items!!"
- ↑ a b Yu-Gi-Oh! Duel 201 (Duelist Duel 142): "Warriors Assemble"
- ↑ a b Yu-Gi-Oh! Duel 288 (Millennium World Duel 10): "In the Name of the Gods"
- ↑ Yu-Gi-Oh! Duel 289 (Millennium World Duel 11): "The Supreme Blow!"
- ↑ Yu-Gi-Oh! Duel 291 (Millennium World Duel 13): "The Ancient Duel!!"
- ↑ Yu-Gi-Oh! Duel 299 (Millennium World Duel 21): "Assault on the Palace!"
- ↑ a b c d Yu-Gi-Oh! Duel 305 (Millennium World Duel 27): "Ruler of Shadows!!"
- ↑ Yu-Gi-Oh! Duel 307 (Millennium World Duel 29): "Shadows Fall!!"
- ↑ a b Yu-Gi-Oh! Duel 257 (Duelist Duel 198): "Memories of Fate"
- ↑ a b Yu-Gi-Oh! Duel 14: "The Man from Egypt (Part 2)"
- ↑ a b c d e f g h i Yu-Gi-Oh! Duel 1: "The Puzzle of the Gods"
- ↑ a b c Yu-Gi-Oh! Duel 50: "Millennium Enemy 1: The Mysterious Transfer Student"
- ↑ a b c d e f Yu-Gi-Oh! Duel 144 (Duelist Duel 85): "The Room of Revenge"
- ↑ Yu-Gi-Oh! Duel 280 (Millennium World Duel 2): "A Sleepless Night"
- ↑ a b Yu-Gi-Oh! Duel 279 (Millennium World Duel 1): "The Millennium Treasure"
- ↑ a b c d Yu-Gi-Oh! Duel 138 (Duelist Duel 79): "Dungeon Crisis!!"
- ↑ a b Yu-Gi-Oh! Duel 150 (Duelist Duel 91): "The Gathering"
- ↑ a b Yu-Gi-Oh! Duel 2: "Lying Eyes"
- ↑ Yu-Gi-Oh! Duel 3: "Hard Beat!"
- ↑ Yu-Gi-Oh! Duel 4: "Jail Break!"
- ↑ Yu-Gi-Oh! Duel 5: "The False Prophet"
- ↑ Yu-Gi-Oh! Duel 6: "Into the Fire"
- ↑ Yu-Gi-Oh! Duel 7: "The Face of Truth"
- ↑ Yu-Gi-Oh! Duel 8: "The Poison Man"
- ↑ Yu-Gi-Oh! Duel 10: "The Cards with Teeth (Part 2)"
- ↑ Yu-Gi-Oh! Duel 12: "The Wild Gang (Part 2)"
- ↑ a b Yu-Gi-Oh! Duel 13: "The Man from Egypt (Part 1)"
- ↑ Yu-Gi-Oh! Duel 15: "The Other Criminal"
- ↑ Yu-Gi-Oh! Duel 16: "Shadi's Challenge"
- ↑ Yu-Gi-Oh! Duel 17: "Game Start!"
- ↑ Yu-Gi-Oh! Duel 19: "Final Stage"
- ↑ Yu-Gi-Oh! Duel 24: "Capsule Monster Chess"
- ↑ Yu-Gi-Oh! Duel 25: "The One-Inch Terror"
- ↑ Yu-Gi-Oh! Duel 26: "Russian Roulette"
- ↑ Yu-Gi-Oh! Duel 32: "Chainsaw Deathmatch!!"
- ↑ Yu-Gi-Oh! Duel 34: "Arena #2"
- ↑ Yu-Gi-Oh! Duel 41: "Let's Find "Love"!"
- ↑ Yu-Gi-Oh! Duel 42: "Get the Million!!"
- ↑ Yu-Gi-Oh! Duel 43: "Monster Fight!! (Part 1)"
- ↑ Yu-Gi-Oh! Duel 45: "13 O'clock Terror!!"
- ↑ a b Yu-Gi-Oh! Duel 46: "The Evil Dragon Cards (Part 1)"
- ↑ Yu-Gi-Oh! Duel 47: "The Evil Dragon Cards (Part 2)"
- ↑ Yu-Gi-Oh! Duel 48: "Jonouchi!! Soul Battle!! (Part 1)"
- ↑ Yu-Gi-Oh! Duel 49: "Jonouchi!! Soul Battle!! (Part 2)"
- ↑ Yu-Gi-Oh! Duel 60 (Duelist Duel 1): "Challenge!!"
- ↑ Yu-Gi-Oh! Duel 90 (Duelist Duel 31): "Call of the Grave"
- ↑ Yu-Gi-Oh! Duel 128 (Duelist Duel 69): "The Downfall of Toon World"
- ↑ Yu-Gi-Oh! Duel 129 (Duelist Duel 70): "The Sacrifice!"
- ↑ Yu-Gi-Oh! Duel 130 (Duelist Duel 71): "Heart to Heart"
- ↑ Yu-Gi-Oh! Duel 132 (Duelist Duel 73): "The Tragic Tale of the Millennium Eye"
- ↑ Yu-Gi-Oh! Duel 133 (Duelist Duel 74): "The Precious Piece"
- ↑ Yu-Gi-Oh! Duel 136 (Duelist Duel 77): "D.D.M.!!"
- ↑ Yu-Gi-Oh! Duel 137 (Duelist Duel 78): "The Path of Darkness!"
- ↑ a b Yu-Gi-Oh! Duel 140 (Duelist Duel 81): "The Broken Bond"
- ↑ a b c Yu-Gi-Oh! Duel 141 (Duelist Duel 82): "The Calling of the Powers"
- ↑ Yu-Gi-Oh! Duel 142 (Duelist Duel 83): "Solve the Puzzle!!"
- ↑ a b Yu-Gi-Oh! Duel 143 (Duelist Duel 84): "Zero Attack?!"
- ↑ Yu-Gi-Oh! Duel 145 (Duelist Duel 86): "Chains"
- ↑ a b Yu-Gi-Oh! Duel 146 (Duelist Duel 87): "The Ancient Stone"
- ↑ Yu-Gi-Oh! Duel 147 (Duelist Duel 88): "The Lost Cards"
- ↑ Yu-Gi-Oh! Duel 149 (Duelist Duel 90): "Where I Belong"
- ↑ Yu-Gi-Oh! Duel 193 (Duelist Duel 134): "Heart Attack!!"
- ↑ Yu-Gi-Oh! Duel 194 (Duelist Duel 135): "The Card of Pride"
- ↑ Yu-Gi-Oh! Duel 195 (Duelist Duel 136): "Yugi Fights Alone"
- ↑ Yu-Gi-Oh! Duel 196 (Duelist Duel 137): "The Last Piece of the Puzzle"
- ↑ Yu-Gi-Oh! Duel 199 (Duelist Duel 140): "The Treasure"
- ↑ Yu-Gi-Oh! Duel 204 (Duelist Duel 145): "The Thing in the Dark"
- ↑ Yu-Gi-Oh! Duel 233 (Duelist Duel 174): "Duel in the Dark!"
- ↑ Yu-Gi-Oh! Duel 237 (Duelist Duel 178): "The Eve of Battle"
- ↑ Yu-Gi-Oh! Duel 281 (Millennium World Duel 3): "Mystery of the the Artifact!!"
- ↑ Yu-Gi-Oh! Duel 282 (Millennium World Duel 4): "Voyage into Memories"
- ↑ a b Yu-Gi-Oh! Duel 283 (Millennium World Duel 5): "The Six Chosen Priests"
