Forum:Deck Guide/Mill
by Gadjiltron
Under (re-)construction
Contents
Intro[edit]
The term "mill" originated from the MtG card Millstone, which was one of the first cards of its kind to throw cards straight from the opponent's Deck into the Graveyard. Over time, sufficient cards with similar effects were released, giving rise to the Mill Deck, which achieves victory by rendering the opponent unable to draw cards due to an empty Deck. Naturally, games like Yu-Gi-Oh with game rules that grant automatic loss upon trying to draw from an empty Deck have their adaptations of said strategy.
The concept of Deck Destruction is a controversial one, since players like to actually play their cards rather than watch their own resources get denied. The anime has dramatized this to the extreme, often destroying characters' Decks down to the last card, putting them on the verge of Decking Out with the last card being the one card they must count on to win. The players in reality, on the other hand, were denied this dramatic power, as real-life milling effects are severely watered down and/or more difficult to activate.
There's also the issue of power creep. Over time, Graveyard-based interactions became more and more prolific, and at this point the Graveyard is often used as a "second hand". No longer is this attributed to Zombie and Lightsworn Decks — nearly everyone has a way to recycle cards out of the GY or banish it for their own purposes. As That Grass Looks Greener demonstrates, milling yourself generates a lot of advantage!
Many archetypes have tried, and several have failed in this regard due to how clunky the Deck is. If you wish to embark on this win condition, proceed.
Runick[edit]
Perhaps the most successful of mill-based archetypes, the Runick cards an unconventional archetype focused on Quick-Play Spells and banishing the opponent's cards off the top of their Deck. You deny their resources more thoroughly since you don't have to worry about Graveyard shenanigans, and you have a lot of leeway to accommodate floodgates or interruption as you see fit. The drawback is that this Deck frequently skips your Battle Phase and has zero offensive options, so you're not winning games very quickly. Each Runick Quick-Play has a second option to Summon a Runick Fusion monster from your Extra Deck which can serve to aid the win condition by searching cards or punishing the opponent for trying to swing in.
The neat thing about this Deck is that every card is an effective Instant Fusion to put out free bodies, so you can use them as extenders or Material. You can condense Main Deck content to the few relevant cards to accommodate what you're making a hybrid with.
The Basics[edit]
- Spells
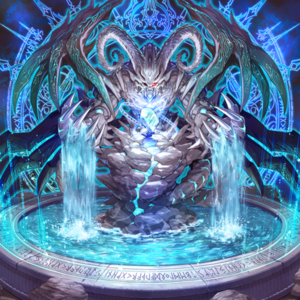
- Runick Fountain - The Field Spell that holds the whole strategy together. Fountain lets you play your Runick Quick-Play Spells directly from your hand during your opponent's turn. After resolving a Runick Quick-Play, you can target up to three Runick Quick-Plays in your GY, shuffle them into the Deck and draw that many cards. Fountain allows you to keep the gas going as you continue to disrupt the opponent in ways they cannot easily work around. But get rid of the Fountain and Runicks lose gas really quickly! Run as many as you can.
- Runick Allure - After any Quick-Play resolves, banish the top card of your opponent's Deck. It aids your overall game plan, as every card counts. You can only control one at a time, but this is also searchable, so no biggie. Run up to 1.
- Runick Tip - The big searcher of the archetype. In exchange for having the weakest banishing power at just one card, Tip searches for any Runick card in your Deck. Run 3, no questions.
- Runick Freezing Curses - Negate a monster, banish 3. Very simple disruption since monster effects are everywhere. Run 3.
- Runick Flashing Fire - Destroy a Special Summoned monster, banish 2. Snipes Extra Deck monsters that lack protection, or trips over extenders that would lead to problematic monsters. Run 3.
- Runick Destruction - The in-house MST. Destroy a S/T, banish 4. Even if you feel the opponent is lacking in backrow, you can force out Counter Traps or shut off other troublesome cards. Run 2-3.
- Runick Dispelling - It's more reactive as it has a specific trigger condition. When your opponent draws or searches outside the Draw Phase, slam this down to discard a random card from their hand and then banish 2. It's not Droll & Lock Bird, but it's searchable. Usefulness depends on the meta. Run up to 2.
- Runick Smiting Storm - Banish cards from the opponent's Deck equal to the number of cards they control. It's got a very high banish ceiling, able to do up to 12 cards at once, but if you let your opponent accumulate such a big board they can straight-up negate this card or are on the verge of winning. Thus you only use this if you want to proc your Fountain or grab your Fusion. Run up to 2.
- Runick Golden Droplet - A controversial inclusion. You get the opponent to draw 1 card, but you also banish 4. Letting your opponent draw can potentially get them something to utterly thwart your plans, but if you can use this to seal the deal, that draw hardly matters. Run up to 1.
- Runick Slumber - Give a monster temporary protection from destruction, but it also can't attack that turn, and then banish 3. You can use it to defend your own monsters from getting destroyed as an extra layer of defense, or you can deny an attack from an opponent. Run 2-3.
- Fusion Monsters
Wait! These have Fusion Material but there aren't Main Deck monsters! What gives? The Runick Fusions can only be feasibly Summoned using the secondary effects of your Runick Quick-Plays. You never "properly" Fusion Summon them.
- Hugin the Runick Wings - On Summon, discard a card to search for a Runick Field Spell. Also, if your cards would be destroyed by card effect, as a replacement effect you can banish her instead. If she gets destroyed, she returns to the Extra Deck. Hugin is what lets you access Fountain from nearly any card in the Deck, thanks to the common secondary effect between the Quick-Plays. If your opponent threatens your Fountain, you can respond with the Quick-Play putting Hugin down to then protect your cards even within the same Chain. Run 2-3 depending on whether you're going pure or hybrid.
- Munin the Runick Wings - Hugin's other half is a little less exciting, since he searches for Runick Allure instead of Fountain and he negates things that target your Runick and face-down cards in a separate Chain. But he's got a tough 2000 DEF and fills you up on 1000 LP each End Phase, giving you the staying power to outlast assaults or win by time rules. Run 1-2.
- Geri the Runick Fangs - Geri is indestructible to card effects and can retrieve Fountain or Allure from your GY. 1000 DEF is easy to beat over, but if your opponent does so it can destroy any card on the field in retaliation. Decent recovery and punishment. Run 1-2.
- Freki the Runick Fangs - Freki actually has an ATK score! But it won't deal any battle damage. If an attack is declared involving it, whether it's you or your opponent attacking, you get to banish 2, and if this card goes down you get a Runick Quick-Play from your GY. However, because you're constantly skipping your Battle Phase, it's hard to get value off it, and you'd end up pulling this out as a backup defender. Run up to 1, though many players won't really bother.
- Sleipnir the Runick Mane - Hey, you can actually do battle damage with it! Well, not much with 1500/1500 stats. During your Main or opponent's Battle, you can temporarily banish this card and an opponent's monster, though its timing means that you can't sit on this monster to use as disruption. Also if your opponent draws or tutors a card, you get a 1500/1500 Token. The Level, triggers, and size of this thing might make you think of Generaiders, and you're actually right, since both archetypes happen to be linked via lore! But that's a story for a different article. Sleipnir plus the Token it's guaranteed to generate fulfills the activation condition for Tyrant's Tirade - essentially Mystic Mine at home. Do you enjoy watching your opponent not Play the GameTM? Run 1-2.
Example Deck[edit]
Decklist purposely left incomplete to display the core of the Deck. Fill the empty slots with cards as you see fit.
Runick
| ||
|---|---|---|
Runick Spright[edit]
Decklist purposely left incomplete to display the core of the Deck. Fill the empty slots with cards as you see fit.
Runick Spright
| ||
|---|---|---|
Naturia Runick[edit]
Decklist purposely left incomplete to display the core of the Deck. Fill the empty slots with cards as you see fit.
Naturia Runick
| ||
|---|---|---|
Mayakashi[edit]
The Mayakashi archetype is built around Synchro and Link climbing to summon your entire Extra Deck in one go, in order to load up the GY with your bosses since they actually do something when revived from the GY. Turns out, because you Special Summon so much, they synergize wonderfully with Soul-Absorbing Bone Tower, which mills 2 per Zombie you Special Summon. A full Synchro ladder with Bone Tower down will mill your opponent's entire Deck in a single turn! Provided your opponent doesn't interrupt you.
The Basics[edit]
- Soul-Absorbing Bone Tower - The card that makes the Deck tick. Every Zombie you Special Summon leads to a mill 2. Without it, your game plan is kinda scuffed and you'll have to figure out a different way to Play the GameTM. Run 3.
- Hajun, the Winged Mayakashi - The one-card combo that goes into the entire Mayakashi setup. On Summon, you can Special Summon a Mayakashi monster from your Deck, and while he's on the field you're locked into Mayakashis from the Extra Deck. He's the starter which sets up the whole Synchro Ladder or a Link-2, and if he gets negated you're a sitting duck. Run 3.
- Dakki, the Graceful Mayakashi - The second part of the core Mayakashi combo. Every time you Special Summon a Mayakashi monster from your Extra Deck, you can Special Summon Dakki from your GY, though for the rest of the turn you're Mayakashi-locked. This is not a once-per-turn. With Hajun and Dakki you can proceed to Synchro Summon all the Mayakashi Synchros in sequence, then Link climb into all three Yuki Onna. But she's a garnet. Run 1-2.
- Yuki-Musume, the Ice Mayakashi - A valuable extender. If you control a Mayakashi monster, you can Special Summon her from hand or GY, then mill a Zombie of your choice. You're also Mayakashi-locked while you control her. Get down another body to set up the Mayakashi ladder, or just jump straight into Yuki-Onna. Run 2-3.
- Mezuki - Good Zombie extender and valuable Foolish target. Revive your own Mayakashis when you are forced to Play the GameTM. Run 2-3.
- Mayakashi Return - Search or mill any Mayakashi card. Incredibly valuable. Run 3.
- One for One - Get Hajun down without needing your Normal Summon. Compulsory.
- Ghost Meets Girl - A Masterful Mayakashi Shiranui Saga - If you're down on luck and have to Play the GameTM, pop this on your opponent's turn to keep them from Playing the GameTM. Run up to 1.
- Extra Deck Monsters
Each of the Synchro monsters only revive themselves if a Zombie Synchro that's exactly 2 Levels higher is destroyed and sent to the GY. They also do something when Special Summoned from the GY.
- Oboro-Guruma, the Wheeled Mayakashi - The LV3 Synchro that provides all your monsters with temporary immunity from destruction in battle.
- Tsuchigumo, the Poisonous Mayakashi - The LV5 Synchro that mills 3 for both sides. Actually one of the monsters that you would want to revive proactively as it furthers your win con.
- Tengu, the Winged Mayakashi - The LV7 Synchro destroys a S/T on revival.
- Yoko, the Graceful Mayakashi - The LV9 Synchro destroys a monster on revival.
- Gashadokuro, the Skeletal Mayakashi - The LV11 Synchro, being at the top of the Synchro ladder, acts a little differently, only reviving itself if a Zombie Link is destroyed. When it does so, it also becomes temporarily immune to all card effects, and is a troublesome monster to overcome combined with its stats.
- Yuki-Onna, the Ice Mayakashi - The Link 2 Yuki-Onna has an okay 1900 ATK, and protects herself from attacks if she's pointing to a Synchro monster. If a Synchro monster is destroyed, she halves the stats of a monster. She doesn't see a lot of time on the field as she's often the stepping stone to her advanced forms.
- Yuki-Onna, the Icicle Mayakashi - The Link 3 does a lot to tie the archetype together. On Summon, she negates a monster's effects which is more valuable than a simple stat reduction. If in the GY, you can banish her to revive a Zombie Synchro as a Quick Effect, so she lends into interruption should you find yourself forced to Play the GameTM.
- Yuki-Onna, the Absolute Zero Mayakashi - Your end boss is the Link 4 Yuki-Onna, and one you sit on. When a monster effect is activated in the GY or a monster is Special Summoned from the GY, she can negate a monster's effects on the field and reduce it to 0 ATK. Twice per turn! Even outside her archetype she's a fantastic partner in crime with Doomking Balerdroch or Eldlich the Golden Lord!
The rest of the Mayakashi archetype is not terribly relevant to the FTK build.
Example Deck[edit]
Decklist purposely left incomplete to display the core of the Deck. Fill the empty slots with cards as you see fit.
Mayakashi FTK
| ||||
|---|---|---|---|---|
|
Inferno Tempest OTK[edit]
So here's Inferno Tempest. It's a gimmicky card needing you to take 3000 or more damage, which banishes all monsters from both Decks. Against a monster mash Deck, this is guaranteed to erase the whole Deck, but against most others, your opponent is still guaranteed to have some left behind. What do? Enter Necroface, which banishes 5 cards off both players' Decks if banished, even by Inferno Tempest. Unless the opponent was heavy on the backrow like Sky Striker, Labrynth or Runick, you're bound to mop up what's left.
The Basics[edit]
- Necroface + Inferno Tempest - Take 3000 damage from a single battle, banish all monsters from both Decks, including three Necrofaces, which will erase the remaining S/Ts in the Decks. Usually your opponent has no Deck left when you're done.
- Jizukiru, the Star Destroying Kaiju/Dogoran, the Mad Flame Kaiju/Lava Golem - How are you going to get 3000 ATK on the opponent's field? Simple: Use a Kaiju! Then, Summon a humble 0 ATK token and ram it! Best part is that the Kaiju can out the opponent's boss monsters or whatever that can intrude on your field.
- Nibiru, the Primal Being - Still want interruption? Smash open the opponent's board with the giant rock. Manipulate it right and you can get a Nibiru Token with over 6000 ATK or DEF so that you can ram Nibiru yourself and proc Tempest with a single card.
- Hippo Carnival - Put out a bunch of 0 ATK Tokens to ram with. If you're on the defensive, you can stick them in Defense Position.
- Magical Mallet - Drew Necroface? Put it back in the Deck where you need it.
- Virtual World Hime - Nyannyan - Extend your mills with her. When she and your Necrofaces are banished from Tempest, stack your triggers such that Nyannyan resolves first. Put one of your Necrofaces back in the Deck, such that it will get banished again by the other Necrofaces. Very few Decks will have any cards left after everything is done resolving!
Example Deck[edit]
Decklist purposely left incomplete to display the core of the Deck. Fill the empty slots with cards as you see fit.
Inferno Tempest OTK
|
|---|


