Difference between revisions of "Yu-Gi-Oh! - Episode 199"
(→Slight revision taking into account the original Japanese version.) |
|||
| Line 7: | Line 7: | ||
| english = Tomb of the Nameless Pharaoh | | english = Tomb of the Nameless Pharaoh | ||
| kanji = 究極のゲーム | | kanji = 究極のゲーム | ||
| − | | romaji = | + | | romaji = Kyuukyoku no Geemu |
| − | | japanese translated = Ultimate Game | + | | japanese translated = The Ultimate Game |
| episode number = 199 | | episode number = 199 | ||
| japanese air date = April 7, 2004 | | japanese air date = April 7, 2004 | ||
| Line 18: | Line 18: | ||
}} | }} | ||
| − | Episode 199 (''' | + | Episode 199 ('''The Ultimate Game''') marks the beginning of the (Millennium World) story arc of the ''[[Yu-Gi-Oh! second series anime]]''. |
| + | = Chaser. = | ||
| − | + | * The episode opens with [[Ryo Bakura]] running away from something or someone one night. A creepy voice questions where he plans on going to, scaring the guts out of him. He runs into a nearby church and all candles light up on their own. Ryou demands of the "voice" to leave him alone, but the voice/voices counter that running is futile: he has a "role" to fulfill. Now, [[Yami Bakura]]'s voice can be recognized overlapped with an unknown one. It somehow is chasing Ryou even though the [[Millennium Ring]] is in possession of [[Yuugi]] & [[Yami Yugi]]. | |
| − | *[[ | ||
| − | |||
| + | * Yami Bakura and the other voice go on saying that there 3 parties which possess [[Millennium Items]]: [[Shadhi]], [[Ryo Bakura]] himself and, lastly, [[Pharaoh Atem|The Pharaoh]]. The voice is convinced that [[Shadhi]] will give his Items to the Pharaoh sooner or later. So, all of the Items will be gathered by both Ryou and the Pharaoh. | ||
| − | + | * However, the 7 Items won't be enough to open the "Door of the Realm of the Dead", the "Door of the Dark Power" which [[Marik Ishtar]] had mentioned to [[Yami Bakura]] during the [[Battle City]] arc. An "8th key" is needed, something which Marik knew about but didn't get to disclose. It's surely hidden in the Pharaoh's "World of Memories". | |
| − | + | * Ryou protests that he doesn't know anything about this, but the organ vibrates and all window panels shatter. Yami Bakura and the "voice" are apparently possessing Ryou. | |
| − | + | :'''[[Yami Bakura]]:''' "''Nameless Pharaoh! When the door of memories opens, the Ultimate Dark Game, spanning over 3,000 years will begin! * evil laugther *''" | |
| + | == Sugoroku's memories. == | ||
| + | |||
| + | * We switch to the 1960s (the date is given by the original Japanese version). A younger Sugoroku, accompanied by two guides, reaches the '''[[Valley of the Kings]]''', a place where, in Ancient Egypt, all past Pharaohs have been laid to rest. | ||
| + | |||
| + | * At the time of his visit, over 60 ancient tombs had been discovered in this valley, but no one had dared enter the inner chambers of [[Pharaoh Atem|Nameless Pharaoh]]'s tomb. The one person that did and survived, was a villager known by Sugoroku's guides. He was driven mad and repeated the same phrase over and over: "''The Dark Game''" (''Yami No Game'' in Japanese) before he died. | ||
| + | |||
| + | * One of the guides reminds him the deal: they're going to lead him to the entrance, but they're not his bodyguards. Sugoroku is to lead them to the treasure. Sugoroku agrees: he doesn't want any treasure. He's just here to take on the challenge of the "Ultimate Game". If he loses, then he's vowed to himself to quit gambling and wear overalls for the rest of his life. The guides laugh at it and remind him that it's more than his pride which is he staking tonight. | ||
| + | |||
| + | [[File:Tomb-of-the-Nameless-Pharaoh.jpg|left|thumb|200px|Sugoroku enters [[Pharaoh Atem|The Nameless Pharaoh]]'s Ancient Tomb]] | ||
| − | |||
==The Tomb of the Nameless Pharaoh== | ==The Tomb of the Nameless Pharaoh== | ||
| − | Before reaching the end of [[Pharaoh Atem]]'s Tomb and the [[Millennium Puzzle]], | + | Before reaching the end of [[Pharaoh Atem|Nameless Pharaoh]]'s Tomb and the [[Millennium Puzzle]], Sugoroku and his guides had to go through a variety of trapped rooms as the ancient treasure was well defended. Each room was treated like a "game", with the ultimate sacrifice awaiting those who lost: death. |
| − | |||
===Room 1: The Needle-Spitting Snake Statues=== | ===Room 1: The Needle-Spitting Snake Statues=== | ||
[[File:Atem-Tomb Snake-Statues.jpg|thumb|The Needle-Spitting Snake Statues]] | [[File:Atem-Tomb Snake-Statues.jpg|thumb|The Needle-Spitting Snake Statues]] | ||
| − | |||
| − | + | *In the first room Sugoroku had to cross contained two giant snake statues: their eyes were encrusted with rubies, but it was just a gimmick to attract the greed of unwary adventurers, for their mouths were motion-activated traps which shot out deadly needles. | |
| + | * After he spotted the trap (by throwing out his cigarette into the middle of the room), Sugoroku thwarted the danger by carefully avoiding the room's motion sensors. | ||
===Room 2: The "Invisible Ink" Tablet=== | ===Room 2: The "Invisible Ink" Tablet=== | ||
[[File:Atem-Tomb Invisible-Ink-Tablet.jpg|left|thumb|The "Invisible Ink" Tablet]] | [[File:Atem-Tomb Invisible-Ink-Tablet.jpg|left|thumb|The "Invisible Ink" Tablet]] | ||
| − | |||
| − | |||
| − | |||
| − | + | * This room contained a giant statue of [[Wikipedia:Horus|Horus]] and a seemingly blank Tablet. Upon closer examination however, there was a receptacle for tar just below the Tablet, which prompted Sugoroku to light it on fire with his torch. Like magic, poof: ancient hieroglyphs appeared on the Tablet: | |
| + | :"''Ahead is the sleeping place of the great Pharaoh. Trespassers' bodies who dare to defy the Gods will be eaten and their souls will be buried into the ''Dark.''''")<br> | ||
| + | * Soon after, a passageway opened up in the ground, with stairs leading down to the next room. | ||
| − | ===Room 3: The Maze Across the Pit | + | ===Room 3: The Maze Across the Dark Pit=== |
| − | [[File:Atem-Tomb Maze-Pit-of-Shadows.jpg|thumb|The Maze Across the Pit | + | [[File:Atem-Tomb Maze-Pit-of-Shadows.jpg|thumb|The Maze Across the Dark Pit]] |
| − | |||
| − | The | + | * The North & South ends of this room were separated by a large chasm, with a narrow maze-like corridor providing the only way of reaching the exit. On top of this maze, big statues armed with scimitars blocked the passage. A pressure-sensitive switch also activated a moving spiked wall, a proper incentive to "motivate" hesitant adventurers. |
| + | * The statues would activate and slash with their weapons if the traveler did not "show respect", which in ancient Egyptian ways meant putting your left foot forward (the heart is on the left side of the body, which meant facing the heart towards the Pharaoh). By doing so Sugoroku was able to cross the room, but lost one of his guides to the pit since he got nervous and failed to comply. | ||
===Room 4: The Monster Bridge=== | ===Room 4: The Monster Bridge=== | ||
[[File:Atem-Tomb Monster-Bridge.jpg|left|thumb|The Monster Bridge]] | [[File:Atem-Tomb Monster-Bridge.jpg|left|thumb|The Monster Bridge]] | ||
| − | : | + | : "''The Ka residing in the tablets will judge you. Cowards' souls will be eaten by Specters. Courageous ones will be shown the way.''") |
| − | |||
| − | As he crossed the bridge, | + | As he crossed the bridge, Sugoroku was shot in the back by his other guide and wounded. However as the guide crossed the bridge himself, a KA sensed his fear and attacked him ("swallowing" him alive in the original Japanese). The spirit of [[Pharaoh Atem|the Pharaoh]] then helped Sugoroku from his predicament, so that he could retrieve the [[Millennium Puzzle]] The Pharaoh calls Sugoroku "[[Shimon Muran|Shimon]]"). |
<br clear="left"/> | <br clear="left"/> | ||
| − | == | + | ==Haga, Ryuuzaki, and Yami Bakura== |
| − | + | ||
| + | * Back at the present, Sugoroku finishes recalling his tale to Yuugi, who was interested on it because he's going to Egypt the next morning in order to unlock Yami's memories. Sugoroku pleads of Yuugi to let him see the God Cards and he says he wants to keep them. Yuugi refuses: they're very important to "[[Yami Yugi|His other self]]". Sugoroku tells him that he has the duty to restore the Pharaoh's memories. | ||
| + | |||
| + | * When Yuugi finally falls asleep, [[Insector Haga]] and [[Dinosaur Ryuzaki]], wearing yellow raincoats, break into his dorm room and grab the bag containing all of the gathered [[Millennium Items]] along with the Puzzle's box in which Yuugi stored the God Cards. | ||
| + | |||
| + | * They run off and rummage into the bag, taken aback by the stuff inside. Suddenly, the [[Millennium Ring]] engages and flies towards someone's hand: [[Yami Bakura]]! | ||
| + | |||
| + | * When questioned if he seeks the God Cards, too, he merely replies that it'd be bothersome if they were to be stolen right now: he uses the Ring's power to knock them out and just then Yuugi makes it to the scene to confront [[Yami Bakura]]. | ||
| + | |||
| + | * The episode ends. | ||
=Changes to the English version= | =Changes to the English version= | ||
| − | *When the story of young [[Solomon Muto]] begins, a text appears on the screen setting the date: " | + | *When the story of young [[Solomon Muto]] begins, a text appears on the screen setting the date: "1960s". |
*A voice-over of the old [[Solomon Muto]] (as voiced by [[wikipedia:Maddie Blaustein|Maddie Blaustein]]) accompanies the story throughout in the English version. There is no voice-over in the original Japanese, but rather the "young" [[Solomon Muto]] tells his own tale. | *A voice-over of the old [[Solomon Muto]] (as voiced by [[wikipedia:Maddie Blaustein|Maddie Blaustein]]) accompanies the story throughout in the English version. There is no voice-over in the original Japanese, but rather the "young" [[Solomon Muto]] tells his own tale. | ||
*When he tells his guides the reason for finding the Pharaoh's tomb, a flashback of [[Solomon Muto]]'s gambling & gaming past is shown in the Japanese version. | *When he tells his guides the reason for finding the Pharaoh's tomb, a flashback of [[Solomon Muto]]'s gambling & gaming past is shown in the Japanese version. | ||
| Line 87: | Line 101: | ||
*The scene where the bridge monster eats the guide (as shown by shadows on the wall) is cut from the English version. | *The scene where the bridge monster eats the guide (as shown by shadows on the wall) is cut from the English version. | ||
*In the Japanese version, as the [[Pharaoh Atem|Pharaoh]] helps Solomon get up he calls him "Shimon", probably recognizing him as [[Shimon Muran]]'s reincarnation (or mistaking him as his ancient [[The Sacred Guardians|Sacred Guardian]]). In the English dub, the Pharaoh simply says "''I have been waiting for you''". | *In the Japanese version, as the [[Pharaoh Atem|Pharaoh]] helps Solomon get up he calls him "Shimon", probably recognizing him as [[Shimon Muran]]'s reincarnation (or mistaking him as his ancient [[The Sacred Guardians|Sacred Guardian]]). In the English dub, the Pharaoh simply says "''I have been waiting for you''". | ||
| − | |||
{{Yu-Gi-Oh! episodes/season 5}} | {{Yu-Gi-Oh! episodes/season 5}} | ||
Revision as of 17:43, 23 November 2011
| Names | |
|---|---|
| Series | |
| Series | Yu-Gi-Oh! |
| Number | 199 |
| Season | 5 |
| Chronology | |
| Yu-Gi-Oh! episodes (season 5) | |
| Previous | "Sinister Secrets - Part 3" |
| Next | "Spiritual Awakening" |
Episode 199 (The Ultimate Game) marks the beginning of the (Millennium World) story arc of the Yu-Gi-Oh! second series anime.
Chaser.
- The episode opens with Ryo Bakura running away from something or someone one night. A creepy voice questions where he plans on going to, scaring the guts out of him. He runs into a nearby church and all candles light up on their own. Ryou demands of the "voice" to leave him alone, but the voice/voices counter that running is futile: he has a "role" to fulfill. Now, Yami Bakura's voice can be recognized overlapped with an unknown one. It somehow is chasing Ryou even though the Millennium Ring is in possession of Yuugi & Yami Yugi.
- Yami Bakura and the other voice go on saying that there 3 parties which possess Millennium Items: Shadhi, Ryo Bakura himself and, lastly, The Pharaoh. The voice is convinced that Shadhi will give his Items to the Pharaoh sooner or later. So, all of the Items will be gathered by both Ryou and the Pharaoh.
- However, the 7 Items won't be enough to open the "Door of the Realm of the Dead", the "Door of the Dark Power" which Marik Ishtar had mentioned to Yami Bakura during the Battle City arc. An "8th key" is needed, something which Marik knew about but didn't get to disclose. It's surely hidden in the Pharaoh's "World of Memories".
- Ryou protests that he doesn't know anything about this, but the organ vibrates and all window panels shatter. Yami Bakura and the "voice" are apparently possessing Ryou.
- Yami Bakura: "Nameless Pharaoh! When the door of memories opens, the Ultimate Dark Game, spanning over 3,000 years will begin! * evil laugther *"
Sugoroku's memories.
- We switch to the 1960s (the date is given by the original Japanese version). A younger Sugoroku, accompanied by two guides, reaches the Valley of the Kings, a place where, in Ancient Egypt, all past Pharaohs have been laid to rest.
- At the time of his visit, over 60 ancient tombs had been discovered in this valley, but no one had dared enter the inner chambers of Nameless Pharaoh's tomb. The one person that did and survived, was a villager known by Sugoroku's guides. He was driven mad and repeated the same phrase over and over: "The Dark Game" (Yami No Game in Japanese) before he died.
- One of the guides reminds him the deal: they're going to lead him to the entrance, but they're not his bodyguards. Sugoroku is to lead them to the treasure. Sugoroku agrees: he doesn't want any treasure. He's just here to take on the challenge of the "Ultimate Game". If he loses, then he's vowed to himself to quit gambling and wear overalls for the rest of his life. The guides laugh at it and remind him that it's more than his pride which is he staking tonight.
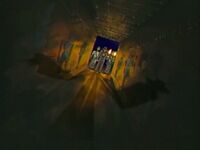
The Tomb of the Nameless Pharaoh
Before reaching the end of Nameless Pharaoh's Tomb and the Millennium Puzzle, Sugoroku and his guides had to go through a variety of trapped rooms as the ancient treasure was well defended. Each room was treated like a "game", with the ultimate sacrifice awaiting those who lost: death.
Room 1: The Needle-Spitting Snake Statues
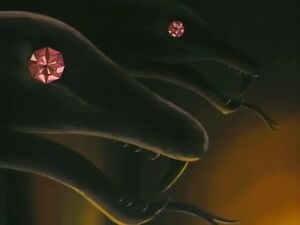
- In the first room Sugoroku had to cross contained two giant snake statues: their eyes were encrusted with rubies, but it was just a gimmick to attract the greed of unwary adventurers, for their mouths were motion-activated traps which shot out deadly needles.
- After he spotted the trap (by throwing out his cigarette into the middle of the room), Sugoroku thwarted the danger by carefully avoiding the room's motion sensors.
Room 2: The "Invisible Ink" Tablet
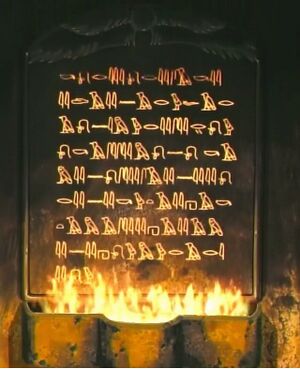
- This room contained a giant statue of Horus and a seemingly blank Tablet. Upon closer examination however, there was a receptacle for tar just below the Tablet, which prompted Sugoroku to light it on fire with his torch. Like magic, poof: ancient hieroglyphs appeared on the Tablet:
- "Ahead is the sleeping place of the great Pharaoh. Trespassers' bodies who dare to defy the Gods will be eaten and their souls will be buried into the Dark.'")
- Soon after, a passageway opened up in the ground, with stairs leading down to the next room.
Room 3: The Maze Across the Dark Pit
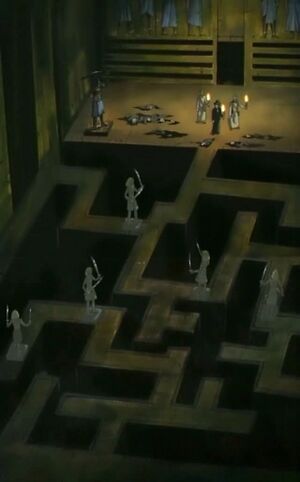
- The North & South ends of this room were separated by a large chasm, with a narrow maze-like corridor providing the only way of reaching the exit. On top of this maze, big statues armed with scimitars blocked the passage. A pressure-sensitive switch also activated a moving spiked wall, a proper incentive to "motivate" hesitant adventurers.
- The statues would activate and slash with their weapons if the traveler did not "show respect", which in ancient Egyptian ways meant putting your left foot forward (the heart is on the left side of the body, which meant facing the heart towards the Pharaoh). By doing so Sugoroku was able to cross the room, but lost one of his guides to the pit since he got nervous and failed to comply.
Room 4: The Monster Bridge
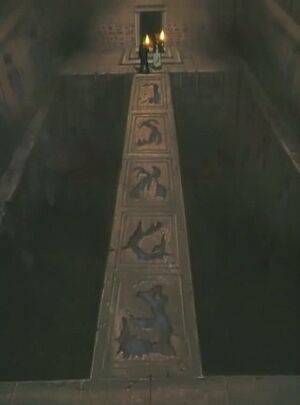
- "The Ka residing in the tablets will judge you. Cowards' souls will be eaten by Specters. Courageous ones will be shown the way.")
As he crossed the bridge, Sugoroku was shot in the back by his other guide and wounded. However as the guide crossed the bridge himself, a KA sensed his fear and attacked him ("swallowing" him alive in the original Japanese). The spirit of the Pharaoh then helped Sugoroku from his predicament, so that he could retrieve the Millennium Puzzle The Pharaoh calls Sugoroku "Shimon").
Haga, Ryuuzaki, and Yami Bakura
- Back at the present, Sugoroku finishes recalling his tale to Yuugi, who was interested on it because he's going to Egypt the next morning in order to unlock Yami's memories. Sugoroku pleads of Yuugi to let him see the God Cards and he says he wants to keep them. Yuugi refuses: they're very important to "His other self". Sugoroku tells him that he has the duty to restore the Pharaoh's memories.
- When Yuugi finally falls asleep, Insector Haga and Dinosaur Ryuzaki, wearing yellow raincoats, break into his dorm room and grab the bag containing all of the gathered Millennium Items along with the Puzzle's box in which Yuugi stored the God Cards.
- They run off and rummage into the bag, taken aback by the stuff inside. Suddenly, the Millennium Ring engages and flies towards someone's hand: Yami Bakura!
- When questioned if he seeks the God Cards, too, he merely replies that it'd be bothersome if they were to be stolen right now: he uses the Ring's power to knock them out and just then Yuugi makes it to the scene to confront Yami Bakura.
- The episode ends.
Changes to the English version
- When the story of young Solomon Muto begins, a text appears on the screen setting the date: "1960s".
- A voice-over of the old Solomon Muto (as voiced by Maddie Blaustein) accompanies the story throughout in the English version. There is no voice-over in the original Japanese, but rather the "young" Solomon Muto tells his own tale.
- When he tells his guides the reason for finding the Pharaoh's tomb, a flashback of Solomon Muto's gambling & gaming past is shown in the Japanese version.
- Solomon Muto's cigarette is replaced by a toothpick in the English version.
- In the original Japanese version, viewers can catch a glimpse of a gun inside one of the guides' vest. When the spiked wall trap is activated, the same guide pulls out the gun and points it at Solomon Muto ordering him to cross the maze.
- As Solomon Muto crosses the final bridge, the guide shoots him in the back with his gun. This scene is cut from the English version: the guide uses a slingshot instead.
- The scene where the bridge monster eats the guide (as shown by shadows on the wall) is cut from the English version.
- In the Japanese version, as the Pharaoh helps Solomon get up he calls him "Shimon", probably recognizing him as Shimon Muran's reincarnation (or mistaking him as his ancient Sacred Guardian). In the English dub, the Pharaoh simply says "I have been waiting for you".
