Difference between revisions of "Yu-Gi-Oh! Dungeon Dice Monsters (video game)"
m |
Dinoguy1000 (talk | contribs) (restore from the Internet Archive (January 8, 2023)) |
||
| (36 intermediate revisions by 18 users not shown) | |||
| Line 1: | Line 1: | ||
| − | {{ | + | {{Infobox video game |
| − | + | | image = DDM-VideoGame-NA.png | |
| − | + | | ja_name = {{Ruby|遊|ユウ}}{{Ruby|戯|ギ}}{{Ruby|王|オウ}}ダンジョンダイスモンスターズ | |
| − | + | | romaji_name = Yūgiō Danjon Daisu Monsutāzu | |
| − | + | | platform = Game Boy Advance | |
| − | + | | languages = | |
| − | + | * Japanese | |
| − | + | * English | |
| − | + | * French | |
| − | + | * German | |
| − | + | * Italian | |
| − | + | * Spanish | |
| − | + | | developer = [[Konami]] | |
| − | + | | publisher = Konami | |
| − | + | | ja_release_date = March 21, 2001 | |
| − | + | | na_release_date = February 11, 2003 | |
| + | | guide_book = Yu-Gi-Oh! Dungeon Dice Monsters Game Guide 1 | ||
| + | | card_list = List of Yu-Gi-Oh! Dungeon Dice Monsters (video game) cards | ||
}} | }} | ||
| − | '''Yu-Gi-Oh Dungeon Dice Monsters''' is a video game version of [[Yu-Gi-Oh! Dungeon Dice Monsters|Dungeon Dice Monsters]] for Game Boy Advance. | + | '''''Yu-Gi-Oh! Dungeon Dice Monsters''''' ({{Ruby|遊|ユウ}}{{Ruby|戯|ギ}}{{Ruby|王|オウ}}ダンジョンダイスモンスターズ ''Yūgiō Danjon Daisu Monsutāzu'') is a video game version of [[Yu-Gi-Oh! Dungeon Dice Monsters|Dungeon Dice Monsters]] for Game Boy Advance. |
==Gameplay== | ==Gameplay== | ||
| − | + | At the beginning of your turn, you throw 3 dice with different icons, each dice corresponding to a monster. If you get two stars with the same level, you can summon a monster, unfolding the dice to create a path on the playing field. The goal of this game is to hit your opponent three times. | |
| − | + | ==Options== | |
| + | [[File:DDM MainMenu.jp..png|thumb|Main Menu]] | ||
| + | |||
| + | All these options can be chosen from the main menu:- | ||
| + | |||
| + | {| class=wikitable | ||
| + | ! Option Description | ||
| + | ! Image | ||
| + | |- | ||
| + | ! colspan="2" | Dice Pool | ||
| + | |- | ||
| + | | | ||
| + | * This is where you see your dice and add / remove dice from your "pool". | ||
| + | | [[File:DDM DicePool.jp.png|160px|Dice Pool]] | ||
| + | |- | ||
| + | ! colspan="2" | Tournament | ||
| + | |- | ||
| + | | | ||
| + | * This is where you go to progress the game. Fighting against duelists of | ||
| + | "increasing difficulty". | ||
| + | | [[File:DDM Division1.jp.png|160px|Tournament]] | ||
| + | |- | ||
| + | ! colspan="2" | Free Duel | ||
| + | |- | ||
| + | | | ||
| + | * Here you can face the duelists that you have beaten in the tournaments. | ||
| + | | [[File:DDM FreeDuel.jp.png|160px|Free Duel]] | ||
| + | |- | ||
| + | ! colspan="2" | Link Duel | ||
| + | |- | ||
| + | | | ||
| + | * This is where you play against a real opponent via the link cable | ||
| + | | [[File:DDM LinkDuel.jp.png|160px|Link Duel]] | ||
| + | |- | ||
| + | ! colspan="2" | Trade | ||
| + | |- | ||
| + | | | ||
| + | * Trade with a friend via the GBA link cable. | ||
| + | | [[File:DDM Trade.jp.png|160px|Trade]] | ||
| + | |- | ||
| + | ! colspan="2" | Grandpa’s Shop | ||
| + | |- | ||
| + | | | ||
| + | * Here you can buy Dice from [[Solomon Muto|Yugi’s Grandpa]]’s [[Kame Game|game shop]]. | ||
| + | | [[File:DDM Grandpa’sShop.jp.png|160px|Grandpa’s Shop]] | ||
| + | |} | ||
| + | |||
| + | ==Tournaments== | ||
| + | In the game the player must play many tournaments in order to beat the game, here are list of these tournaments listed in 3 Divisions | ||
| + | |||
| + | ===Division 1=== | ||
| + | [[File:DDM Division1.jp.png|thumb|right|160px|Division 1]] | ||
| + | {{clear}} | ||
| + | |||
| + | {| class=wikitable | ||
| + | ! Tournament Description | ||
| + | ! Image | ||
| + | |- | ||
| + | ! colspan="2" | The Lunch Selects Cup | ||
| + | |- | ||
| + | | | ||
| + | * Difficulty: easy | ||
| + | |||
| + | Description: A good place to start off and practice your skills. | ||
| + | Strategy: This is pretty straight forward gameplay. Nothing special. | ||
| + | Just get to the end as fast as possible using low level dice and | ||
| + | summon a level 2 to finish the job. | ||
| + | |||
| + | Original Prize: 100G | ||
| + | | [[File:DDM TheLunchSelectsCup.jp.png|160px|The Lunch Selects Cup]] | ||
| + | |- | ||
| + | ! colspan="2" | Black Crown Cup | ||
| + | |- | ||
| + | | | ||
| + | * Difficulty: easy | ||
| + | |||
| + | Description: This is another beginner’s tournament. Normal field. | ||
| + | |||
| + | Original Prize: 150G | ||
| + | | [[File:DDM BlackCrown Cup.jp.png|160px|Black Crown Cup]] | ||
| + | |- | ||
| + | ! colspan="2" | Gammon Preliminaries | ||
| + | |- | ||
| + | | | ||
| + | * Difficulty: easy | ||
| + | |||
| + | Description: This is another beginner’s tournament. Normal field. | ||
| + | |||
| + | Original Prize: 200G | ||
| + | | [[File:DDM GammonPreliminaries.jp.png|160px|Gammon Preliminaries]] | ||
| + | |- | ||
| + | ! colspan="2" | Domino Tournament | ||
| + | |- | ||
| + | | | ||
| + | * Difficulty: Easy | ||
| + | |||
| + | Description: This is another beginner’s tournament. Normal field. | ||
| + | |||
| + | Original Prize: 250 | ||
| + | | [[File:DDM DominoTournament.jp.png|160px|Domino Tournament]] | ||
| + | |- | ||
| + | ! colspan="2" | Japan Rep Tournament | ||
| + | |- | ||
| + | | | ||
| + | * Difficulty: Easy to intermediate | ||
| + | |||
| + | Description: This is the second to last tournament in the first group. | ||
| + | The field has a water square taken already in the middle. You can’t | ||
| + | touch this square when putting down dungeon path. | ||
| + | |||
| + | Original Prize: 300G | ||
| + | | [[File:DDM JapanRepTournament.jp.png|160px|Japan Rep Tournament]] | ||
| + | |- | ||
| + | ! colspan="2" | World Championship | ||
| + | |- | ||
| + | | | ||
| + | * Difficulty: Easy to intermediate | ||
| + | |||
| + | Description: The last tournament in the first group. To get to this tournament | ||
| + | you must first beat of the other first round tournaments. | ||
| + | |||
| + | The field has two spots which you can’t touch while summoning. They are | ||
| + | located four spaces to the right and four spaces up from each duelist’s | ||
| + | die master. | ||
| + | |||
| + | After you win this tournament you get to see the credits screen. | ||
| + | |||
| + | Original Prize: 400G | ||
| + | | [[File:DDM WorldChampionship.jp.png|160px|World Championship]] | ||
| + | |} | ||
| + | |||
| + | ===Division 2: REVERSE=== | ||
| + | [[File:DDM Division2.jp.png|thumb|right|160px|Division 2]] | ||
| + | {{clear}} | ||
| + | |||
| + | {| class=wikitable | ||
| + | ! Tournament Description | ||
| + | ! Image | ||
| + | |- | ||
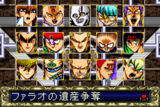
| + | ! colspan="2" | Pharaoh’s Treasure Cup | ||
| + | |- | ||
| + | | | ||
| + | Difficulty: Easy to intermediate | ||
| + | |||
| + | Description: The field has two obstacles located at two squares two the | ||
| + | left or right and eight squares up. | ||
| + | |||
| + | Original Prize: 500G | ||
| + | | [[File:DDM Pharaoh’sTreasureCup.jp.png|160px|Pharaoh’s Treasure Cup]] | ||
| + | |- | ||
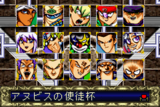
| + | ! colspan="2" | Anubis’s Disciple Cup | ||
| + | |- | ||
| + | | | ||
| + | * Difficulty: Easy to intermediate | ||
| + | |||
| + | Description: This course’s two "obstacles" are located: | ||
| + | 1) four spaces forward of one die master | ||
| + | 2) two spaces up, and two spaces to the right of the other die master. | ||
| + | |||
| + | Original Prize: 550G | ||
| + | | [[File:DDM Anubis’sDiscipleCup.jp.png|160px|Anubis’s Disciple Cup]] | ||
| + | |- | ||
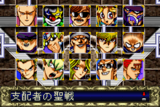
| + | ! colspan="2" | Dominator’s Holy War | ||
| + | |- | ||
| + | | | ||
| + | * Difficulty: Easy to intermediate | ||
| + | |||
| + | Description: This course’s four "obstacles" are located: | ||
| + | 1) 3 spaces forward and 2 spaces to the left of your die master, | ||
| + | 2) 9 spaces forward and 5 spaces to the left of your die master, | ||
| + | 3) 9 spaces forward and 5 spaces to the right of your opponent’s die master. | ||
| + | 4) 3 spaces to the left and 4 spaces forward from your opponent’s die master. | ||
| + | |||
| + | |||
| + | Original Prize: 600G | ||
| + | | [[File:DDM Dominator’sHolyWar.jp.png|160px|Dominator’s Holy War]] | ||
| + | |- | ||
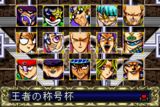
| + | ! colspan="2" | King’s Title Cup | ||
| + | |- | ||
| + | | | ||
| + | * Difficulty: Easy to intermediate | ||
| + | |||
| + | Description: This course’s four "obstacles" are located: | ||
| + | 1) 3 spaces to the left and 2 spaces forward from your die master. | ||
| + | 2) 4 spaces to the left and 5 spaces forward from your die master. | ||
| + | 3) 3 spaces to the left and 1 space forward from your opponent’s die master. | ||
| + | 4) 5 spaces to the left and 3 spaces forward from your opponent’s die master. | ||
| + | |||
| + | Original Prize: 650G | ||
| + | | [[File:DDM King’sTitleCup.jp.png|160px|King’s Title Cup]] | ||
| + | |- | ||
| + | ! colspan="2" | Millennium Kingdom Cup | ||
| + | |- | ||
| + | | | ||
| + | * Difficulty: Easy to intermediate | ||
| + | |||
| + | Description: This course’s four "obstacles" are located: | ||
| + | 1) 3 spaces to the left and 5 spaces forward from your die master. | ||
| + | 2) 5 spaces to the right and 3 spaces forward from your die master. | ||
| + | 3) 4 spaces to the left and 5 space forward of your opponent’s die master. | ||
| + | 4) 4 spaces to the right and 4 spaces forward of your opponent’s die master. | ||
| + | |||
| + | Original Prize: 700G | ||
| + | | [[File:DDM MillenniumKingdomCup.jp.png|160px|Millennium Kingdom Cup]] | ||
| + | |- | ||
| + | ! colspan="2" | Last Holy War Cup | ||
| + | |- | ||
| + | | | ||
| + | * Difficulty: Intermediate | ||
| + | |||
| + | Description: To get to this tournament, you have to win all of the other | ||
| + | tournaments in the "reverse" division. If you win, you see the credits | ||
| + | screen again and you advance to the next level of tournaments. | ||
| + | |||
| + | This course’s four "obstacles" are located: | ||
| + | 1) 4 spaces forward from you die master. | ||
| + | 2) 3 spaces forward and 1 space left from your die master. | ||
| + | 3) 3 spaces forward and 1 space right from your die master. | ||
| + | 4) 1 space forward and 1 space to the left of your opponent’s die master. | ||
| + | |||
| + | Original Prize: 800G | ||
| + | | [[File:DDM LastHolyWarCup.jp.png|160px|Last Holy War Cup]] | ||
| + | |} | ||
| + | |||
| + | ===Division 3: DARK=== | ||
| + | [[File:DDM Division3.jp.png|thumb|right|160px|Division 3]] | ||
| + | {{clear}} | ||
| + | |||
| + | {| class=wikitable | ||
| + | ! Tournament Description | ||
| + | ! Image | ||
| + | |- | ||
| + | ! colspan="2" | Dark Carnival | ||
| + | |- | ||
| + | | | ||
| + | Difficulty: Intermediate | ||
| + | |||
| + | Description: This tournament has 12 obstacles, (six on each side). | ||
| + | They are located about halfway down the field in pyramids with the base | ||
| + | of the pyramids located at the field’s left and right borders. | ||
| + | |||
| + | Original Prize: 1000G | ||
| + | | [[File:DDM DarkCarnival.jp.png|160px|Dark Carnival]] | ||
| + | |- | ||
| + | ! colspan="2" | Dark Ceremony | ||
| + | |- | ||
| + | | | ||
| + | * Difficulty: Intermediate | ||
| + | |||
| + | Description: This course’s 12 "obstacles" are located: | ||
| + | 1) 5 spaces to the left and 1 space forward from your die master. | ||
| + | 2) 5 spaces to the left and 4 spaces forward from your die master. | ||
| + | 3) 5 spaces to the left and 7 spaces forward from your die master. | ||
| + | 4) 5 spaces to the left and 10 spaces forward from your die master. | ||
| + | 5) 5 spaces to the left and 13 spaces forward from your die master. | ||
| + | 6) 5 spaces to the left and 16 spaces forward from your die master. | ||
| + | 7) 5 spaces to the right and 1 space forward from your die master. | ||
| + | 8) 5 spaces to the right and 4 spaces forward from your die master. | ||
| + | 9) 5 spaces to the right and 7 spaces forward from your die master. | ||
| + | 10) 5 spaces to the right and 10 spaces forward from your die master. | ||
| + | 11) 5 spaces to the right and 13 spaces forward from your die master. | ||
| + | 12) 5 spaces to the right and 16 spaces forward from your die master. | ||
| + | |||
| + | |||
| + | Original Prize: 1050G | ||
| + | | [[File:DDM DarkCeremony.jp.png|160px|Dark Ceremony]] | ||
| + | |- | ||
| + | ! colspan="2" | Corridor of the Dead | ||
| + | |- | ||
| + | | | ||
| + | * Difficulty: Intermediate | ||
| + | |||
| + | Description: This course’s 5 "obstacles" are located: | ||
| + | 1) 3 spaces forward from your die master. | ||
| + | 2) 6 spaces forward from your die master. | ||
| + | 3) 9 spaces forward from your die master. | ||
| + | 4) 12 spaces forward from your die master. | ||
| + | 5) 15 spaces forward from your die master. | ||
| + | |||
| + | Original Prize: 1100G | ||
| + | | [[File:DDM CorridoroftheDead.jp.png|160px|Corridor of the Dead]] | ||
| + | |- | ||
| + | ! colspan="2" | Sacrificial Guillotine | ||
| + | |- | ||
| + | | | ||
| + | * Difficulty: Intermediate | ||
| + | |||
| + | Description: This course’s 5 "obstacles" are located: | ||
| + | 1) 6 spaces left and 4 spaces forward from your die master. | ||
| + | 2) 3 spaces left and 4 spaces forward from your die master. | ||
| + | 3) 4 spaces forward from your die master. | ||
| + | 4) 3 spaces right and 4 spaces forward from your die master. | ||
| + | 5) 3 spaces right and 10 spaces forward from your die master. | ||
| + | |||
| + | Original Prize: 1150G | ||
| + | | [[File:DDM SacrificialGuillotine.jp.png|160px|Sacrificial Guillotine]] | ||
| + | |- | ||
| + | ! colspan="2" | Coliseum of the Dead | ||
| + | |- | ||
| + | | | ||
| + | * Difficulty: Intermediate | ||
| + | |||
| + | Description: This course’s 8 "obstacles" are located: | ||
| + | 1) 1 space left and 4 spaces forward from your die master. | ||
| + | 2) 2 spaces right and 4 spaces forward from your die master. | ||
| + | 3) 5 spaces right and 4 spaces forward from your die master. | ||
| + | 4) 5 spaces left and 9 spaces forward from your die master. | ||
| + | 5) 2 spaces left and 9 spaces forward from your die master. | ||
| + | 6) 1 space left and 4 spaces forward from your opponent’s die master. | ||
| + | 7) 2 spaces right and 4 spaces forward from your opponent’s die master. | ||
| + | 8) 5 spaces right and 4 spaces forward from your opponent’s die master. | ||
| + | |||
| + | |||
| + | Original Prize: 1200G | ||
| + | | [[File:DDM ColiseumoftheDead.jp.png|160px|Coliseum of the Dead]] | ||
| + | |- | ||
| + | ! colspan="2" | The Last Judgment | ||
| + | |- | ||
| + | | | ||
| + | * Difficulty: Intermediate to... hard? | ||
| + | |||
| + | Description: The last tournament in the game. To get to this tournament, you | ||
| + | must win all of the other tournaments in the Dark division. If you win, | ||
| + | you see the credits screen again. | ||
| + | |||
| + | This course’s 4 "obstacles" are located: | ||
| + | 1) 5 spaces left and 5 spaces forward from your die master. | ||
| + | 2) 3 spaces left and 6 spaces forward from your die master. | ||
| + | 3) 7 spaces forward from your die master. | ||
| + | 4) 5 spaces right and 5 spaces forward from your die master. | ||
| + | |||
| + | |||
| + | Original Prize: 1500G | ||
| + | | [[File:DDM TheLastJudgment.jp.png|160px|The Last Judgment]] | ||
| + | |- | ||
| + | ! colspan="2" | Yami Yugi’s challenge | ||
| + | |- | ||
| + | | | ||
| + | * Difficulty: hard? | ||
| + | |||
| + | Description: After winning a certain amount of tournaments, [[Yami Yugi|Yami]] will | ||
| + | challenge you. | ||
| + | |||
| + | This course’s 9 "obstacles" are located: | ||
| + | 1) 5 spaces left and 1 space forward from your die master. | ||
| + | 2) 2 spaces left and 5 spaces forward from your die master. | ||
| + | 3) 3 spaces right and 3 spaces forward from your die master. | ||
| + | 4) 5 spaces right and 1 space forward from your die master. | ||
| + | 5) 9 spaces forward from your die master. | ||
| + | 6) 5 spaces left and 1 space forward from your opponent's die master. | ||
| + | 7) 3 spaces left and 4 spaces forward from your opponent's die master. | ||
| + | 8) 5 spaces right and 1 space forward from your opponent's die master. | ||
| + | 9) 4 spaces right and 4 spaces forward from your opponent's die master. | ||
| + | |||
| + | |||
| + | Original Prize: 1500G | ||
| + | when you defeat him you may get DMG in shop, if not,now you can´t,the only ways now are: | ||
| + | -code | ||
| + | -you have 45% of chances if you duel yami yugi in the semifinal | ||
| + | -you have 89% of chance of getting it if you duel him in the final | ||
| + | -you have 91% of chance of have her in shop if you duel him in the final match | ||
| + | -you WILL have her if you face Marik,Yami Bakura,and him | ||
| + | | [[File:DDM YamiYugi’schallenge.jp.png|160px|Yami Yugi’s challenge]] | ||
| + | |} | ||
==Characters== | ==Characters== | ||
| − | Most characters in the game are from the [[Yu-Gi-Oh! manga|manga]]. A few original characters are added. Since the English manga mostly used characters' names from the Japanese version, while almost all other English media used the names | + | Most characters in the game are from the [[Yu-Gi-Oh! (manga)|''Yu-Gi-Oh!'' manga]]. A few original characters are added. Since the English manga mostly used characters' names from the Japanese version, while almost all other English media used the names from the English [[Yu-Gi-Oh! (second series anime)|anime]], the English version of this game is the only place where English "dub" names are used for many characters. |
| + | |||
| + | {| class="wikitable" style="margin: auto;" | ||
| + | |+ Original characters | ||
| + | |- | ||
| + | | [[File:Norman-DDM.png|50px]] || [[File:Lloyd-DDM.png|50px]] || [[File:Roger-DDM.png|50px]] || [[File:Andrea-DDM.png|50px]] || [[File:Diana-DDM.png|50px]] || [[File:Paul-DDM.png|50px]] || [[File:Ryan-DDM.png|50px]] || [[File:Jill-DDM.png|50px]] || [[File:Doris-DDM.png|50px]] | ||
| + | |- | ||
| + | | [[Norman]] || [[Lloyd]] || [[Roger]] || [[Andrea (DDM)|Andrea]] || [[Diana (DDM)|Diana]] || [[Paul]] || [[Ryan]] || [[Jill]] || [[Doris]] | ||
| + | |} | ||
| + | |||
| + | ==Game guides== | ||
| + | {{Main|''Yu-Gi-Oh! Dungeon Dice Monsters Game Guide 1''}} | ||
| + | |||
| + | ==Promotional cards== | ||
| + | {{main|Yu-Gi-Oh! Dungeon Dice Monsters promotional cards}} | ||
| + | In Japan only, ''Yu-Gi-Oh! Dungeon Dice Monsters'' was bundled with 3 artwork cards of "[[Dark Magician Girl]]". These cards are not ''OCG'' or ''Dungeon Dice Monsters'' cards; however, they do use a modified ''OCG'' [[card backing]]. | ||
| + | |||
| + | ==Gallery== | ||
| + | <gallery> | ||
| + | DDM-VideoGame-NA.png|North American English cover | ||
| + | DDM-VideoGameJP.png|Japanese cover | ||
| + | </gallery> | ||
| + | |||
| + | ==External links== | ||
| + | * [https://web.archive.org/web/20030404070020/http://www.konami.com/dungeondice/ Official English site] (archive) | ||
| + | * [https://web.archive.org/web/20070809155602/http://www.konami.jp/gs/game/yugioh_ddm/ Official Japanese site] (archive) | ||
| + | * [http://www.spriters-resource.com/game_boy_advance/ygodungeon/ The Spriters Resource page] | ||
| + | * [https://www.speedrun.com/yu-gi-oh_dungeon_dice_monsters Speedrun.com page] | ||
| + | * [https://retroachievements.org/game/5537 Retro Achievements page] | ||
| − | {{ | + | {{Video games}} |
| − | + | [[Category:Yu-Gi-Oh! Dungeon Dice Monsters (video game)| ]] | |
| + | [[Category:Video games|Dungeon Dice Monsters, Yu-Gi-Oh!]] | ||
Latest revision as of 01:51, 23 May 2023
 | |||||||||||
| Names | |||||||||||
|---|---|---|---|---|---|---|---|---|---|---|---|
| English | Yu-Gi-Oh! Dungeon Dice Monsters | ||||||||||
| |||||||||||
| Development | |||||||||||
| Platform | Game Boy Advance | ||||||||||
| Languages |
| ||||||||||
| Developer | Konami | ||||||||||
| Publisher | Konami | ||||||||||
| Release dates | |||||||||||
| Japanese | March 21, 2001 | ||||||||||
| North American | February 11, 2003 | ||||||||||
| Links | |||||||||||
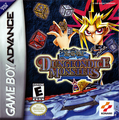
Yu-Gi-Oh! Dungeon Dice Monsters (
Contents
Gameplay[edit]
At the beginning of your turn, you throw 3 dice with different icons, each dice corresponding to a monster. If you get two stars with the same level, you can summon a monster, unfolding the dice to create a path on the playing field. The goal of this game is to hit your opponent three times.
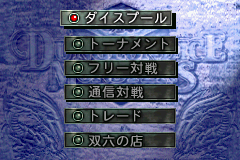
Options[edit]
All these options can be chosen from the main menu:-
| Option Description | Image |
|---|---|
| Dice Pool | |
|
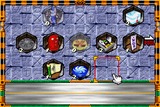
|
| Tournament | |
"increasing difficulty". |
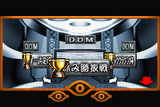
|
| Free Duel | |
|
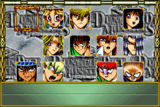
|
| Link Duel | |
|
|
| Trade | |
|
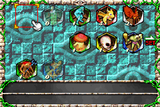
|
| Grandpa’s Shop | |
|

|
Tournaments[edit]
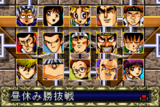
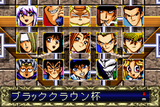
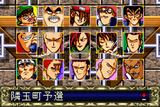
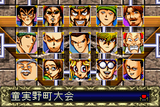
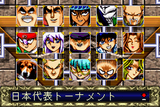
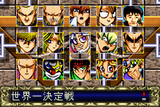
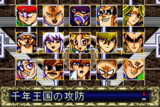
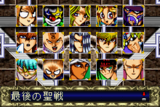
In the game the player must play many tournaments in order to beat the game, here are list of these tournaments listed in 3 Divisions
Division 1[edit]
Division 2: REVERSE[edit]
Division 3: DARK[edit]
| Tournament Description | Image |
|---|---|
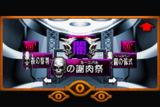
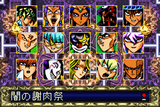
| Dark Carnival | |
|
Difficulty: Intermediate Description: This tournament has 12 obstacles, (six on each side). They are located about halfway down the field in pyramids with the base of the pyramids located at the field’s left and right borders. Original Prize: 1000G |
|
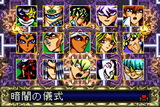
| Dark Ceremony | |
Description: This course’s 12 "obstacles" are located: 1) 5 spaces to the left and 1 space forward from your die master. 2) 5 spaces to the left and 4 spaces forward from your die master. 3) 5 spaces to the left and 7 spaces forward from your die master. 4) 5 spaces to the left and 10 spaces forward from your die master. 5) 5 spaces to the left and 13 spaces forward from your die master. 6) 5 spaces to the left and 16 spaces forward from your die master. 7) 5 spaces to the right and 1 space forward from your die master. 8) 5 spaces to the right and 4 spaces forward from your die master. 9) 5 spaces to the right and 7 spaces forward from your die master. 10) 5 spaces to the right and 10 spaces forward from your die master. 11) 5 spaces to the right and 13 spaces forward from your die master. 12) 5 spaces to the right and 16 spaces forward from your die master.
|
|
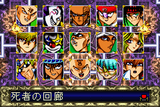
| Corridor of the Dead | |
Description: This course’s 5 "obstacles" are located: 1) 3 spaces forward from your die master. 2) 6 spaces forward from your die master. 3) 9 spaces forward from your die master. 4) 12 spaces forward from your die master. 5) 15 spaces forward from your die master. Original Prize: 1100G |
|
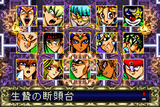
| Sacrificial Guillotine | |
Description: This course’s 5 "obstacles" are located: 1) 6 spaces left and 4 spaces forward from your die master. 2) 3 spaces left and 4 spaces forward from your die master. 3) 4 spaces forward from your die master. 4) 3 spaces right and 4 spaces forward from your die master. 5) 3 spaces right and 10 spaces forward from your die master. Original Prize: 1150G |
|
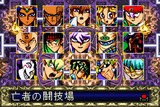
| Coliseum of the Dead | |
Description: This course’s 8 "obstacles" are located: 1) 1 space left and 4 spaces forward from your die master. 2) 2 spaces right and 4 spaces forward from your die master. 3) 5 spaces right and 4 spaces forward from your die master. 4) 5 spaces left and 9 spaces forward from your die master. 5) 2 spaces left and 9 spaces forward from your die master. 6) 1 space left and 4 spaces forward from your opponent’s die master. 7) 2 spaces right and 4 spaces forward from your opponent’s die master. 8) 5 spaces right and 4 spaces forward from your opponent’s die master.
|
|
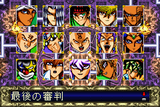
| The Last Judgment | |
Description: The last tournament in the game. To get to this tournament, you must win all of the other tournaments in the Dark division. If you win, you see the credits screen again. This course’s 4 "obstacles" are located: 1) 5 spaces left and 5 spaces forward from your die master. 2) 3 spaces left and 6 spaces forward from your die master. 3) 7 spaces forward from your die master. 4) 5 spaces right and 5 spaces forward from your die master.
|
|
| Yami Yugi’s challenge | |
Description: After winning a certain amount of tournaments, Yami will challenge you. This course’s 9 "obstacles" are located: 1) 5 spaces left and 1 space forward from your die master. 2) 2 spaces left and 5 spaces forward from your die master. 3) 3 spaces right and 3 spaces forward from your die master. 4) 5 spaces right and 1 space forward from your die master. 5) 9 spaces forward from your die master. 6) 5 spaces left and 1 space forward from your opponent's die master. 7) 3 spaces left and 4 spaces forward from your opponent's die master. 8) 5 spaces right and 1 space forward from your opponent's die master. 9) 4 spaces right and 4 spaces forward from your opponent's die master.
|
Yami Yugi’s challenge |
Characters[edit]
Most characters in the game are from the Yu-Gi-Oh! manga. A few original characters are added. Since the English manga mostly used characters' names from the Japanese version, while almost all other English media used the names from the English anime, the English version of this game is the only place where English "dub" names are used for many characters.
 |
 |
 |
 |
 |
 |
 |
 |

|
| Norman | Lloyd | Roger | Andrea | Diana | Paul | Ryan | Jill | Doris |
Game guides[edit]
Promotional cards[edit]
In Japan only, Yu-Gi-Oh! Dungeon Dice Monsters was bundled with 3 artwork cards of "Dark Magician Girl". These cards are not OCG or Dungeon Dice Monsters cards; however, they do use a modified OCG card backing.
