Difference between revisions of "Pharaoh's Memories"
m |
(→Characters) (Tag: New user edit) |
||
| (33 intermediate revisions by 11 users not shown) | |||
| Line 1: | Line 1: | ||
| − | {{ | + | {{About|the anime arc|the manga arc|King's Memories|the composition|""Pharaoh's Memories"" (composition)|the set|''Duelist Pack: Pharaoh's Memories''}} |
| − | |||
| − | {{Infobox | + | {{Infobox arc |
| − | + | | image = Yugioh219.jpg | |
| − | + | | en_name = Pharaoh's Memories | |
| − | + | | ja_name = {{Ruby|王|ファラオ}}の{{Ruby|記憶|きおく}} | |
| − | + | | romaji_name = Farao no Kioku | |
| − | + | | medium = Anime | |
| − | + | | series = ''[[Yu-Gi-Oh! (anime)|Yu-Gi-Oh!]]'' | |
| − | + | | start_date = April 7, 2004 | |
| − | + | | end_date = August 25, 2004 | |
| + | | first = 199: {{episode|Yu-Gi-Oh!|199}} | ||
| + | | last = 219: {{episode|Yu-Gi-Oh!|219}} | ||
| + | | prev = [[Grand Championship (arc)|Grand Championship]] | ||
| + | | next = [[Ceremonial Battle (arc)|Ceremonial Battle]] | ||
}} | }} | ||
| − | |||
| − | |||
| − | |||
| − | |||
| − | |||
| − | |||
| − | |||
| − | |||
| − | |||
| − | |||
| − | |||
| − | |||
| − | |||
| − | |||
| − | |||
| − | |||
| − | |||
| − | |||
| − | |||
| − | + | '''Story 8: Pharaoh's Memories''' ({{Ruby|Story|ストーリー}}8 {{Ruby|王|ファラオ}}の{{Ruby|記憶|きおく}} ''Sutōrī Hachi: Farao no Kioku'') is the second-last story arc of the [[Yu-Gi-Oh! (anime)|''Yu-Gi-Oh!'' anime]]. In the English dub, the Pharaoh's Memories and [[Ceremonial Battle (arc)|Ceremonial Battle]] arcs are collectively referred to as '''Dawn of the Duel'''. | |
| + | |||
| + | Its manga counterpart is [[King's Memories]]. This arc started airing a month after the conclusion of the original manga series. | ||
| + | |||
| + | ==Appearances== | ||
| + | ===Characters=== | ||
| + | <div style="-moz-column-count: 3; -webkit-column-count: 3; column-count: 3;-moz-column-width: 12em; -webkit-column-width: 12em; column-width: 12em;"> | ||
| + | * [[Yugi Muto]] | ||
| + | * [[Yami Yugi]] | ||
| + | * [[Joey Wheeler]] | ||
| + | * [[Téa Gardner]] | ||
| + | * [[Tristan Taylor]] | ||
| + | * [[Solomon Muto]] | ||
| + | * [[Mokuba Kaiba]] | ||
| + | * [[Seto Kaiba]] | ||
| + | * [[Yami Bakura]] | ||
| + | * [[Bakura Ryou]] | ||
| + | * [[Zorc Necrophades]] | ||
| + | * [[Bandit King Bakura]] | ||
| + | * [[Mahad]] | ||
| + | * [[Isis]] | ||
| + | * [[Karim]] | ||
| + | * [[Shada]] | ||
| + | * [[Seto]] | ||
| + | * [[Aknadin]] | ||
| + | * [[Shimon Muran]] | ||
| + | * [[Aknadin's co-conspirators]] | ||
| + | * [[Shadi]] | ||
| + | * [[Hasan]] | ||
| + | * [[Bobasa]] | ||
| + | * [[Ahmet]] | ||
| + | * [[Mushara]] | ||
| + | * [[Kisara]] | ||
| + | * [[Seto's mother]] | ||
| + | * [[Gebelk]] | ||
| + | * [[Mana]] | ||
| + | * [[Rex Raptor]] | ||
| + | * [[Weevil Underwood]] | ||
| + | </div> | ||
| + | |||
| + | ===Cards=== | ||
| + | |||
| + | ==== Monster ==== | ||
| + | '''Effect''' | ||
| + | * [[Slifer the Sky Dragon (anime)|Slifer the Sky Dragon]] | ||
| + | * [[Obelisk the Tormentor (anime)|Obelisk the Tormentor]] | ||
| + | * [[The Winged Dragon of Ra (anime)|The Winged Dragon of Ra]] | ||
| + | * [[Big Shield Gardna (anime)|Big Shield Gardna]] | ||
| + | * [[Dark Magician Girl (anime)|Dark Magician Girl]] | ||
| + | * [[Kuriboh (anime)|Kuriboh]] | ||
| + | * [[Watapon (anime)|Watapon]] | ||
| + | * [[Different Dimension Dragon (later anime)|Different Dimension Dragon]] | ||
| + | * [[Kaiser Glider (anime)|Kaiser Glider]] | ||
| + | * [[Lord of D. (anime)|Lord of D.]] | ||
| + | * [[Spear Dragon (anime)|Spear Dragon]] | ||
| + | * [[Diabound Kernel (anime)|Diabound Kernel]] | ||
| + | * [[Marshmallon (anime)|Marshmallon]] | ||
| + | * [[Silent Swordsman LV0]] | ||
| + | * [[Blocken]] | ||
| + | * [[Lengard]] | ||
| + | * [[Disgraced Mage]] | ||
| + | * [[Necro Soldier]] | ||
| + | * [[Gandora the Dragon of Destruction (anime)|Gandora the Dragon of Destruction]] | ||
| + | * [[Silent Magician LV0]] | ||
| + | * [[Necro Jar]] | ||
| + | * [[Necro Mannequin]] | ||
| + | * [[Necro Wall]] | ||
| + | * [[Gearfried the Iron Knight (anime)|Gearfried the Iron Knight]] | ||
| + | * [[Lava Battleguard (anime)|Lava Battleguard]] | ||
| + | * [[Swamp Battleguard (anime)|Swamp Battleguard]] | ||
| + | * [[Fire Sorcerer (anime)|Fire Sorcerer]] | ||
| + | '''Normal''' | ||
| + | * [[Dark Magician (anime)|Dark Magician]] | ||
| + | * [[Gazelle the King of Mythical Beasts (anime)|Gazelle the King of Mythical Beasts]] | ||
| + | * [[Jack's Knight (anime)|Jack's Knight]] | ||
| + | * [[Summoned Skull (anime)|Summoned Skull]] | ||
| + | * [[Blue-Eyes White Dragon (anime)|Blue-Eyes White Dragon]] | ||
| + | * [[Curse of Dragon (anime)|Curse of Dragon]] | ||
| + | * [[Vorse Raider (anime)|Vorse Raider]] | ||
| + | * [[X-Head Cannon (anime)|X-Head Cannon]] | ||
| + | * [[Headless Knight (anime)|Headless Knight]] | ||
| + | * [[The Earl of Demise (anime)|The Earl of Demise]] | ||
| + | * [[Doomcaliber Knight (anime)|Doomcaliber Knight]] | ||
| + | * [[Flame Swordsman (anime)|Flame Swordsman]] | ||
| + | * [[Red-Eyes B. Dragon (anime)|Red-Eyes Black Dragon]] | ||
| + | '''Union''' | ||
| + | * [[Pitch-Dark Dragon (anime)|Pitch-Dark Dragon]] | ||
| + | * [[Y-Dragon Head (anime)|Y-Dragon Head]] | ||
| + | * [[Z-Metal Tank (anime)|Z-Metal Tank]] | ||
| + | '''Token''' | ||
| + | * [[Necro Wall Token]] | ||
| + | '''Fusion''' | ||
| + | * [[Dragon Master Knight (anime)|Dragon Master Knight]] | ||
| + | * [[XYZ-Dragon Cannon (anime)|XYZ-Dragon Cannon]] | ||
| + | * [[The Duke of Demise]] | ||
| + | * [[Blue-Eyes Ultimate Dragon (anime)|Blue-Eyes Ultimate Dragon]] | ||
| + | * [[Super Roboyarou (anime)|Super Roboyarou]] | ||
| + | '''Ritual''' | ||
| + | * [[Paladin of White Dragon (anime)|Paladin of White Dragon]] | ||
| + | |||
| + | ==== Magic ==== | ||
| + | * [[Card of Sanctity (anime)|Card of Sanctity]] | ||
| + | * [[Polymerization (anime)|Polymerization]] | ||
| + | * [[Pot of Greed (anime)|Pot of Greed]] | ||
| + | * [[Swords of Revealing Light (anime)|Swords of Revealing Light]] | ||
| + | * [[A Wingbeat of Giant Dragon (anime)|A Wingbeat of Giant Dragon]] | ||
| + | * [[Cost Down (anime)|Cost Down]] | ||
| + | * [[Emergency Provisions (anime)|Emergency Provisions]] | ||
| + | * [[Monster Reborn (anime)|Monster Reborn]] | ||
| + | * [[Mystical Space Typhoon (anime)|Mystical Space Typhoon]] | ||
| + | * [[Negate Attack (later DM anime)|Negate Attack]] | ||
| + | * [[Shrink (anime)|Shrink]] | ||
| + | * [[Silent Doom (anime)|Silent Doom]] | ||
| + | * [[Soul Absorption (anime)|Soul Absorption]] | ||
| + | * [[The Flute of Summoning Dragon (anime)|The Flute of Summoning Dragon]] | ||
| + | * [[Grief Tablet]] | ||
| + | * [[Spirit Illusion]] | ||
| + | * [[Card of Demise (anime)|Card of Demise]] | ||
| + | * [[Soul Release (anime)|Soul Release]] | ||
| + | * [[Spell Sanctuary]] | ||
| + | * [[Marshmallon Glasses (anime)|Marshmallon Glasses]] | ||
| + | * [[Turn Jump]] | ||
| + | * [[Negate Defense]] | ||
| + | * [[Cursed Twin Dolls]] | ||
| + | * [[Spirit Sword of Sealing]] | ||
| + | * [[Counterbalance]] | ||
| + | * [[Aria From Beyond]] | ||
| + | * [[Ring of Defense (anime)|Ring of Defense]] | ||
| + | |||
| + | ==== Trap ==== | ||
| + | * [[Attack Guidance Armor (anime)|Attack Guidance Armor]] | ||
| + | * [[Cloning (anime)|Cloning]] | ||
| + | * [[Magical Trick Mirror (anime)|Magical Trick Mirror]] | ||
| + | * [[Ring of Destruction (anime)|Ring of Destruction]] | ||
| + | * [[Mirror Tablet]] | ||
| + | * [[Rebirth Tablet]] | ||
| + | * [[Spirit Shield]] | ||
| + | * [[Call of the Earthbound (anime)|Call of the Earthbound]] | ||
| + | * [[Zoma the Spirit (anime)|Zoma the Spirit]] | ||
| + | * [[Narrow Corridor]] | ||
| + | * [[Necro Cycle]] | ||
| + | |||
| + | ===Games=== | ||
| + | Winners are in bold. | ||
| − | == | + | {| class="wikitable list-noicon" |
| − | + | |- | |
| + | ! scope="col" | Game | ||
| + | ! scope="col" colspan="2" | Players | ||
| + | |- | ||
| + | | [[Room game]] | ||
| + | | colspan="2" | [[Solomon Muto]] | ||
| + | |- | ||
| + | | [[Seto Kaiba and Yami Bakura's Duel|Duel]] | ||
| + | | Seto Kaiba | ||
| + | | Yami Bakura | ||
| + | |- | ||
| + | | ''[[Sacred Guardians, Atem and Bakura's palace Diaha|Diaha]]'' | ||
| + | | Bandit King Bakura | ||
| + | | | ||
| + | * '''Sacred Guardians''' | ||
| + | * '''Atem''' | ||
| + | |- | ||
| + | | ''[[Mahad and Bakura's Diaha|Diaha]]'' | ||
| + | | '''Mahad''' | ||
| + | | Bandit King Bakura | ||
| + | |- | ||
| + | | ''[[Aknadin and Bakura's Diaha|Diaha]]'' | ||
| + | | '''Bandit King Bakura''' | ||
| + | | Aknadin | ||
| + | |- | ||
| + | | ''[[Sacred Guardians, Atem and Bakura's city Diaha|Diaha]]'' | ||
| + | | | ||
| + | * Atem | ||
| + | * Sacred Guardians | ||
| + | | '''Bandit King Bakura''' | ||
| + | |- | ||
| + | | ''[[Prisoners' Diaha|Diaha]]'' | ||
| + | | colspan="2" | 10 prisoners | ||
| + | |- | ||
| + | | ''[[Kisara, Seto and the prisoners' Diaha|Diaha]]'' | ||
| + | | Prisoners | ||
| + | | | ||
| + | * '''Kisara''' | ||
| + | * '''Seto''' | ||
| + | |- | ||
| + | | ''[[Sacred Guardians, Atem and Bakura's Kul Elna Diaha|Diaha]]'' | ||
| + | | | ||
| + | * '''Atem''' | ||
| + | * '''Sacred Guardians''' | ||
| + | | Bandit King Bakura | ||
| + | |- | ||
| + | | [[Dark RPG]] | ||
| + | | '''Yami Yugi''' | ||
| + | | Yami Bakura | ||
| + | |- | ||
| + | | [[Yugi Muto and Yami Bakura's Duel|Duel]] | ||
| + | | '''Yugi Muto''' | ||
| + | | Yami Bakura | ||
| + | |- | ||
| + | | ''[[Atem and Seto's Diaha|Diaha]]'' | ||
| + | | '''Seto''' | ||
| + | | Atem | ||
| + | |- | ||
| + | | ''[[Sacred Guardians, Atem and Zorc's Diaha|Diaha]]'' | ||
| + | | | ||
| + | * Atem | ||
| + | * Sacred Guardians | ||
| + | | Zorc Necrophades | ||
| + | |- | ||
| + | | ''[[Seto Kaiba, Atem and Zorc's Diaha|Diaha]]'' | ||
| + | | | ||
| + | * Seto Kaiba | ||
| + | * Atem | ||
| + | | Zorc Necrophades | ||
| + | |- | ||
| + | | ''[[Yugi's group, Atem and Zorc's Diaha|Diaha]]'' | ||
| + | | | ||
| + | * '''Atem''' | ||
| + | * '''Yugi Muto''' | ||
| + | | Zorc Necrophades | ||
| + | |} | ||
| − | Now that Yugi is home after the battle against [[Dartz]] and the Grand Championship, one more quest is about to be undertaken, knowing the true past of [[Yami Yugi]], the spirit of the [[Millennium Puzzle| | + | ==Summary== |
| + | Now that Yugi is home after the battle against [[Dartz]] and the Grand Championship, one more quest is about to be undertaken, knowing the true past of [[Yami Yugi]], the spirit of the [[Millennium Puzzle|Puzzle]]. [[Yami Bakura]] and Yami Yugi faced off, but Bakura told Yami to play the ultimate [[Shadow Game]] at Egypt. | ||
| − | + | Bakura Duels [[Seto Kaiba]] to gain the power of Kaiba's "[[Blue-Eyes White Dragon (anime)|Blue-Eyes White Dragon]]". After the Duel, Bakura tells Kaiba that something interesting is happening, and Kaiba should go to Egypt to play the ultimate game. He also gives Kaiba the [[Millennium Eye]], which he had previously taken from [[Maximillion Pegasus]] after [[Duelist Kingdom]]. Kaiba, even though he does not show signs of it, agrees, and goes to Egypt. The gang traveled to Egypt, where they reunited with [[Marik Ishtar]], [[Ishizu Ishtar]] and [[Odion Ishtar]]. Ishizu explained that the stone tablet at the museum had been moved back to Egypt, deep within the chambers of the Tomb Keepers. The Ishtars lead them to the stone. Before Yami Yugi presented the God Cards, [[Téa Gardner]] gave him a cartouche that she had just bought, so he can write his name on it when he finds it. Yami Yugi showed the three God Cards to the [[Tablet of Lost Memories]]. This time, a portal was opened, and Yami Yugi and Yami Bakura suddenly went into the tablet. | |
Yami's friends realized that the Memory World may be quite dangerous, and Yami Yugi has a very difficult task to do. Therefore, they wanted to get into the Memory World, but couldn't go through the portal in the tablet. Thus, [[Shadi]] appeared, and helped them find the "real" door to the Memory World, deep within the mazes of Yami Yugi's mind in the Millennium Puzzle. The stage was set for the ultimate game. | Yami's friends realized that the Memory World may be quite dangerous, and Yami Yugi has a very difficult task to do. Therefore, they wanted to get into the Memory World, but couldn't go through the portal in the tablet. Thus, [[Shadi]] appeared, and helped them find the "real" door to the Memory World, deep within the mazes of Yami Yugi's mind in the Millennium Puzzle. The stage was set for the ultimate game. | ||
| Line 45: | Line 248: | ||
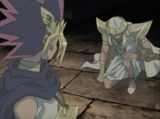
As Yami entered the Memory World, he was shocked to find out that he was in the body of his past self. Around him were the six priests: [[Seto]], [[Aknadin]], [[Mahad]], [[Isis]], [[Shada]] and [[Karim]], each with their own [[Millennium Items|Millennium Item]]. Also, next to him is his vizier, [[Shimon Muran]]. | As Yami entered the Memory World, he was shocked to find out that he was in the body of his past self. Around him were the six priests: [[Seto]], [[Aknadin]], [[Mahad]], [[Isis]], [[Shada]] and [[Karim]], each with their own [[Millennium Items|Millennium Item]]. Also, next to him is his vizier, [[Shimon Muran]]. | ||
| − | + | Back in the Memory World, Yami had little time to react his surroundings, because at that moment, [[Thief King Bakura]] showed up, possessed by Yami Bakura. He summoned his Ka spirit "[[Diabound]]", and attacked the priests. Bakura revealed his plan to take the seven Millennium Items and gain the Shadow Power of the [[Zorc Necrophades]] by putting them all in [[The Millennium Stone|the stone slab]] in an underground crypt in the village of [[Kul Elna]]. The Pharaoh has had enough, and summons "[[Obelisk the Tormentor (original)|Obelisk the Tormentor]]" to attack "Diabound", something the other priests are shocked by. Obelisk and Diabound's power were equal, since Diabound had the power of the Blue-Eyes White Dragon from Yamu Bakura's Duel against Kaiba. Bakura retreats, leaving the priests to discuss what happened. Later on, Seto tells Aknadin about his plan to use the ka of villagers to create a ka stronger than Diabound, which Aknadin objects to. | |
| + | |||
| + | The next day, the priest Mahad plans to lure Bakura into a trap. He leads Bakura to a tomb he made to look like Aknamkanon's tomb. He battles Bakura, but is defeated in the end. He sacrifices his life to fuse his Ka and Ba to turn himself into the [[Dark Magician (character)|Dark Magician]]. While Bakura does get the [[Millennium Ring]] from Mahad, Mahad attacks him and destroys the tomb, but Bakura manages to survive. | ||
| − | + | By this point, Yugi and the others had found the door to the Memory World. Yugi, Joey, Téa, and Tristan had to go alone, because Shadi couldn't enter it. | |
| − | + | Seto and Shada go through the streets and the citizens on the street. Seto tells Shada to use his Millennium Key to test the hearts of the people, and try to find people who are home to strong monsters. When Seto tells Aknadin of his plan, Aknadin begs for Seto to reconsider, but Seto doesn't listen. A short time later, Bakura, wearing the Millennium Ring, attacks Aknadin with Diabound. Deciding not to kill Aknadin, he instead uses the power of the Ring to transfer his evil to Aknadin. | |
| − | + | Finding Bakura, the Pharaoh follows him in pursuit using [[Slifer the Sky Dragon (character)|Slifer the Sky Dragon]]. Eventually, Diabound destroys Slifer and Yami is on the verge of death. However, Yugi and his friends arrive, and give Yami enough energy to summon [[The Winged Dragon of Ra (character)|The Winged Dragon of Ra]], who destroys Diabound. However, time mysteriously reverses itself, resulting in Yugi and his friends not arriving, preventing the Pharaoh from summoning Ra, causing his defeat and disappearance, while Bakura gains the [[Millennium Puzzle|Millennium Pendant]]. | |
| − | Seto and Shada | + | While on their search for criminals with strong Ka, Seto and Shada stop an angry mob from their assault on an innocent woman. Shada senses her powerful Ka (the [[The White Dragon|Blue Eyes White Dragon]]) and Seto takes her back with them to the palace. It is later shown in a flashback that Seto and [[Kisara]] - the girl he rescued - had met before as children. Meanwhile, Aknadin is resting and has a flashback of what happened fifteen years ago: Aknadin created the [[Millennium Items]] at the cost of sacrificing the village of [[Kul Elna]]. It's also revealed that Aknadin is the younger brother of [[Aknamkanon]], the previous Pharaoh, thus revealing that the Pharaoh and Seto are cousins. Now corrupted by Zorc, Aknadin's strongest wish is to see Seto rise to the throne as the new Pharaoh of Egypt. When he learns of Kisara's Ka, he is eager to have Seto extract it from her (and use it to usurp the Pharaoh), but Seto - out of his strong feelings for the girl - refuses. Aknadin then tells the two criminals that are battling to fight with Seto and Kisara instead, but Kisara's White Dragon ka kills both the criminals. |
| − | + | Eventually, Yugi and his friends meet up with [[Bobasa]], who promises to help them. The High Priests and Yugi's group try looking for the Pharaoh. Meanwhile, Yami is in a cave, meeting [[Hasan]], who leaves. Eventually, Atem reunites with his friends, but he, [[Mana]], his childhood friend, and the High Priests leave for Kul Elna to defeat Bakura once and for all. | |
| − | + | Bakura, surprised to see the Pharaoh alive, combats with Diabound, who is strengthened by the ghosts of the deceased villagers of Kul Elna, but Atem summons Mahad, the Dark Magician. Meanwhile, Shada attempts to destroy Diabound's tablet, but Aknadin knocks him unconscious. Eventually, the combined might of the Priests destroy Diabound. Aknadin also arrives with the Millennium Key, and somehow everyone freezes. Yami Bakura's voice also appears, and reduces the Thief King to sand. It is revealed that Yami Yugi and Yami Bakura are playing the [[Dark RPG]]. Yami Bakura's Master Items, his [[Hourglass Token|Hourglass Tokens]], were the ones responsible of reversing time earlier and freezing time currently. Aknadin then takes all the High Priests' Millennium Items and inserts them into the [[Millennium Stone]], causing Zorc Necrophades to be partially summoned. Aknadin then reveals himself to be Priest Seto's father, and his wish is to make Seto pharaoh. Zorc then transforms Aknadin into the Great Shadow Magus. The Great Shadow Magus then launches an attack on the Pharaoh, but Yami Yugi uses his Master Item, Hasan, to deflect the attack to Bakura's Master Item, the Hourglass Token, causing time to move again. Aknadin then takes Seto and teleports him to the palace. | |
| − | + | ||
| − | + | Using the power of the Dark RPG, Yami Bakura revives the Thief King and Diabound, who splits all the Priests and Atem all over the village, who are attacked by bees and monsters. Karim sacrifices himself to destroy a monster, and all the Priests and the Pharaoh reunite. At the center of Kul Elna, Bakura and Diabound sacrifice themselves to summon Zorc Necrophades. Zorc then launches an attack on the Pharaoh, but Hasan takes the hit instead, resulting in Hasan's death. Atem then goes back to the palace to find Seto, while all the Priests wait there and prepare for Zorc's attack. | |
| − | + | ||
| − | + | Meanwhile, Bobasa takes Yugi and his friends to the Valley of the Kings. Yugi, knowing all the traps, makes him and his friends safe from the traps. They are then one room away from the Pharaoh's name, which will make them defeat Zorc, but a fragment of Yami Bakura appears and challenges Yugi to a Duel. | |
| − | + | ||
| − | + | At the palace, Aknadin attempts to extract Kiara's ka, the White Dragon, but Seto refuses. The Great Shadow Magus then kills Kisara, successfully taking her ka. Seto, enraged, murders Aknadin, but his soul possesses Seto. The Pharaoh and Seto Kaiba, who had entered the Memory World, arrives. Priest Seto, possessed by Aknadin, challenges Atem to a battle. During the battle, Aknadin uses the White Dragon, and almost defeats Atem, until the White Dragon destroys itself, and destroys Aknadin, freeing Priest Seto from his possession. Atem and Kaiba then go back to the place where Zorc will be attacking soon. | |
| − | + | ||
| − | + | Meanwhile, during Yugi and Yami Bakura's Duel, Bakura uses a Lockdown/Mill strategy, and reduces Yugi's Deck to one card, but that card turned out to be "[[Gandora the Dragon of Destruction (anime)|Gandora the Dragon of Destruction]]", ensuring Yugi's victory. They then arrive in the room with the Pharaoh's name, but the name is in hieroglyphics, which they cannot read, so they memorize the symbols. | |
| − | + | ||
| − | + | At the palace, the army proves to be futile against Zorc, who proceeds to destroy the city. The Pharaoh then summons the [[Egyptian Gods]], who seem to have destroyed Zorc, but Zorc survives the assault and destroys the Gods. Zorc launches an attack on the Pharaoh, but Shada takes the hit, resulting in his death. Isis, in an attempt to slow Zorc down, sacrifices herself. Shimon Muran also summons [[Exodia the Forbidden One (character)|Exodia the Forbidden One]], who is destroyed by Zorc, resulting in Shimon's death as well. | |
| − | + | ||
| + | Yugi and his friends then arrive, who Summon ''[[Duel Monsters]] ''against Zorc, but are too weak to destroy it. When Zorc attempts to kill the Pharaoh and his modern-day friends, Shadi, from the present, possesses the deceased Hasan, who takes the hit instead, destroying Hasan and Shadi. Just then, Téa has an idea: She tells the group to visualize the hieroglyphics they saw onto the cartouche, then Atem reads out the name once it appears. While they are trying to visualize it, Zorc attempts to attack them, but Kaiba uses "[[Ring of Defense (anime)|Ring of Defense]]" to protect them. The Pharaoh then sees his name on the cartouche, and yells it: Atem. With this, he is able to summon [[The Creator of Light (character)|The Creator of Light]], who destroys Zorc with one light attack. With this, Yami Bakura is destroyed and Yami Yugi wins the Dark RPG, Atem has regained all of his memories. However, the Creator tells Atem and his friends that they have [[Ceremonial Battle|one more task to do]]. | ||
| + | |||
| + | ==Episodes== | ||
| + | {| class="wikitable" width="100%" | ||
| + | |- | ||
| + | ! scope="col" | Screenshot | ||
| + | ! scope="col" | Number | ||
| + | ! scope="col" colspan="2" | Names | ||
| + | ! scope="col" | Japanese air date | ||
| + | ! scope="col" | English air date | ||
| + | |- | ||
| + | {{#ask: | ||
| + | [[Episode series::Yu-Gi-Oh!]][[Episode number::>199]][[Episode number::<219]] | ||
| + | |?Episode number | ||
| + | |?Japanese episode name | ||
| + | |?Romaji episode name | ||
| + | |?Translated Japanese episode name | ||
| + | |?English episode name | ||
| + | |?Japanese air date | ||
| + | |?English air date | ||
| + | |?Screenshot | ||
| + | |?Episode series | ||
| + | |link=none | ||
| + | |format=template | ||
| + | |template=EpisodeListing | ||
| + | |sort=Episode number | ||
| + | }} | ||
| + | |} | ||
| − | + | ==Featured Duels== | |
| + | {| class="wikitable sortable" border="1" style="background: #f8f8ff; border: 1px solid #88a; border-collapse: collapse;" cellspacing="1" cellpadding="2" rules="GROUPS" frame="BOX" | ||
| + | |- style="background: #ccf;" | ||
| + | ! Duel # | ||
| + | ! Episode(s) | ||
| + | ! Duelist #1 | ||
| + | ! class="unsortable" | vs | ||
| + | ! Duelist #2 | ||
| + | ! Winner | ||
| + | ! LP #1 | ||
| + | ! LP #2 | ||
| + | ! Turns | ||
| + | |- | ||
| + | | width="50" align="center" | 1 | ||
| + | | width="100" align="center" | [[Yu-Gi-Oh! - Episode 200|200]] | ||
| + | | width="165" align="center" | ''' [[Yami Bakura]]''' | ||
| + | | width="40" align="center" | ''' vs.''' | ||
| + | | width="165" align="center" | ''' [[Seto Kaiba]]''' | ||
| + | | width="165" align="center" | No Result | ||
| + | | width="80" align="center" | 1400 | ||
| + | | width="80" align="center" | 900 | ||
| + | | width="80" align="center" | 6 | ||
| + | |- | ||
| + | | align="center" | 2 | ||
| + | | align="center" | [[Yu-Gi-Oh! - Episode 215|215]]-[[Yu-Gi-Oh! - Episode 218|218]] | ||
| + | | align="center" | ''' [[Yugi Muto]]''' | ||
| + | | align="center" | ''' vs.''' | ||
| + | | align="center" | ''' [[Yami Bakura]]''' | ||
| + | | align="center" | [[Yugi Muto]] | ||
| + | | align="center" | 3100 | ||
| + | | align="center" | 0 | ||
| + | | align="center" | 17 | ||
| + | |- | ||
| + | |} | ||
{{Yu-Gi-Oh!}} | {{Yu-Gi-Oh!}} | ||
[[Category:Yu-Gi-Oh! story arcs]] | [[Category:Yu-Gi-Oh! story arcs]] | ||
Latest revision as of 04:48, 15 April 2024
| Pharaoh's Memories | |||||||||||
| Names | |||||||||||
|---|---|---|---|---|---|---|---|---|---|---|---|
| English | Pharaoh's Memories | ||||||||||
| |||||||||||
| Arc | |||||||||||
| Medium | Anime | ||||||||||
| Series | Yu-Gi-Oh! | ||||||||||
| Original run | April 7, 2004–August 25, 2004 | ||||||||||
| First episode | 199: "Tomb of the Nameless Pharaoh" | ||||||||||
| Last episode | 219: "In the Name of the Pharaoh" | ||||||||||
| Chronology | |||||||||||
| Previous | "Grand Championship" | ||||||||||
| Next | "Ceremonial Battle" | ||||||||||
Story 8: Pharaoh's Memories (
Its manga counterpart is King's Memories. This arc started airing a month after the conclusion of the original manga series.
Contents
Appearances[edit]
Characters[edit]
- Yugi Muto
- Yami Yugi
- Joey Wheeler
- Téa Gardner
- Tristan Taylor
- Solomon Muto
- Mokuba Kaiba
- Seto Kaiba
- Yami Bakura
- Bakura Ryou
- Zorc Necrophades
- Bandit King Bakura
- Mahad
- Isis
- Karim
- Shada
- Seto
- Aknadin
- Shimon Muran
- Aknadin's co-conspirators
- Shadi
- Hasan
- Bobasa
- Ahmet
- Mushara
- Kisara
- Seto's mother
- Gebelk
- Mana
- Rex Raptor
- Weevil Underwood
Cards[edit]
Monster[edit]
Effect
- Slifer the Sky Dragon
- Obelisk the Tormentor
- The Winged Dragon of Ra
- Big Shield Gardna
- Dark Magician Girl
- Kuriboh
- Watapon
- Different Dimension Dragon
- Kaiser Glider
- Lord of D.
- Spear Dragon
- Diabound Kernel
- Marshmallon
- Silent Swordsman LV0
- Blocken
- Lengard
- Disgraced Mage
- Necro Soldier
- Gandora the Dragon of Destruction
- Silent Magician LV0
- Necro Jar
- Necro Mannequin
- Necro Wall
- Gearfried the Iron Knight
- Lava Battleguard
- Swamp Battleguard
- Fire Sorcerer
Normal
- Dark Magician
- Gazelle the King of Mythical Beasts
- Jack's Knight
- Summoned Skull
- Blue-Eyes White Dragon
- Curse of Dragon
- Vorse Raider
- X-Head Cannon
- Headless Knight
- The Earl of Demise
- Doomcaliber Knight
- Flame Swordsman
- Red-Eyes Black Dragon
Union
Token
Fusion
Ritual
Magic[edit]
- Card of Sanctity
- Polymerization
- Pot of Greed
- Swords of Revealing Light
- A Wingbeat of Giant Dragon
- Cost Down
- Emergency Provisions
- Monster Reborn
- Mystical Space Typhoon
- Negate Attack
- Shrink
- Silent Doom
- Soul Absorption
- The Flute of Summoning Dragon
- Grief Tablet
- Spirit Illusion
- Card of Demise
- Soul Release
- Spell Sanctuary
- Marshmallon Glasses
- Turn Jump
- Negate Defense
- Cursed Twin Dolls
- Spirit Sword of Sealing
- Counterbalance
- Aria From Beyond
- Ring of Defense
Trap[edit]
- Attack Guidance Armor
- Cloning
- Magical Trick Mirror
- Ring of Destruction
- Mirror Tablet
- Rebirth Tablet
- Spirit Shield
- Call of the Earthbound
- Zoma the Spirit
- Narrow Corridor
- Necro Cycle
Games[edit]
Winners are in bold.
| Game | Players | |
|---|---|---|
| Room game | Solomon Muto | |
| Duel | Seto Kaiba | Yami Bakura |
| Diaha | Bandit King Bakura |
|
| Diaha | Mahad | Bandit King Bakura |
| Diaha | Bandit King Bakura | Aknadin |
| Diaha |
|
Bandit King Bakura |
| Diaha | 10 prisoners | |
| Diaha | Prisoners |
|
| Diaha |
|
Bandit King Bakura |
| Dark RPG | Yami Yugi | Yami Bakura |
| Duel | Yugi Muto | Yami Bakura |
| Diaha | Seto | Atem |
| Diaha |
|
Zorc Necrophades |
| Diaha |
|
Zorc Necrophades |
| Diaha |
|
Zorc Necrophades |
Summary[edit]
Now that Yugi is home after the battle against Dartz and the Grand Championship, one more quest is about to be undertaken, knowing the true past of Yami Yugi, the spirit of the Puzzle. Yami Bakura and Yami Yugi faced off, but Bakura told Yami to play the ultimate Shadow Game at Egypt.
Bakura Duels Seto Kaiba to gain the power of Kaiba's "Blue-Eyes White Dragon". After the Duel, Bakura tells Kaiba that something interesting is happening, and Kaiba should go to Egypt to play the ultimate game. He also gives Kaiba the Millennium Eye, which he had previously taken from Maximillion Pegasus after Duelist Kingdom. Kaiba, even though he does not show signs of it, agrees, and goes to Egypt. The gang traveled to Egypt, where they reunited with Marik Ishtar, Ishizu Ishtar and Odion Ishtar. Ishizu explained that the stone tablet at the museum had been moved back to Egypt, deep within the chambers of the Tomb Keepers. The Ishtars lead them to the stone. Before Yami Yugi presented the God Cards, Téa Gardner gave him a cartouche that she had just bought, so he can write his name on it when he finds it. Yami Yugi showed the three God Cards to the Tablet of Lost Memories. This time, a portal was opened, and Yami Yugi and Yami Bakura suddenly went into the tablet.
Yami's friends realized that the Memory World may be quite dangerous, and Yami Yugi has a very difficult task to do. Therefore, they wanted to get into the Memory World, but couldn't go through the portal in the tablet. Thus, Shadi appeared, and helped them find the "real" door to the Memory World, deep within the mazes of Yami Yugi's mind in the Millennium Puzzle. The stage was set for the ultimate game.
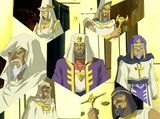
As Yami entered the Memory World, he was shocked to find out that he was in the body of his past self. Around him were the six priests: Seto, Aknadin, Mahad, Isis, Shada and Karim, each with their own Millennium Item. Also, next to him is his vizier, Shimon Muran.
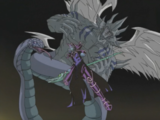
Back in the Memory World, Yami had little time to react his surroundings, because at that moment, Thief King Bakura showed up, possessed by Yami Bakura. He summoned his Ka spirit "Diabound", and attacked the priests. Bakura revealed his plan to take the seven Millennium Items and gain the Shadow Power of the Zorc Necrophades by putting them all in the stone slab in an underground crypt in the village of Kul Elna. The Pharaoh has had enough, and summons "Obelisk the Tormentor" to attack "Diabound", something the other priests are shocked by. Obelisk and Diabound's power were equal, since Diabound had the power of the Blue-Eyes White Dragon from Yamu Bakura's Duel against Kaiba. Bakura retreats, leaving the priests to discuss what happened. Later on, Seto tells Aknadin about his plan to use the ka of villagers to create a ka stronger than Diabound, which Aknadin objects to.
The next day, the priest Mahad plans to lure Bakura into a trap. He leads Bakura to a tomb he made to look like Aknamkanon's tomb. He battles Bakura, but is defeated in the end. He sacrifices his life to fuse his Ka and Ba to turn himself into the Dark Magician. While Bakura does get the Millennium Ring from Mahad, Mahad attacks him and destroys the tomb, but Bakura manages to survive.
By this point, Yugi and the others had found the door to the Memory World. Yugi, Joey, Téa, and Tristan had to go alone, because Shadi couldn't enter it.
Seto and Shada go through the streets and the citizens on the street. Seto tells Shada to use his Millennium Key to test the hearts of the people, and try to find people who are home to strong monsters. When Seto tells Aknadin of his plan, Aknadin begs for Seto to reconsider, but Seto doesn't listen. A short time later, Bakura, wearing the Millennium Ring, attacks Aknadin with Diabound. Deciding not to kill Aknadin, he instead uses the power of the Ring to transfer his evil to Aknadin.
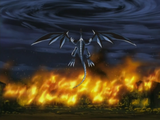
Finding Bakura, the Pharaoh follows him in pursuit using Slifer the Sky Dragon. Eventually, Diabound destroys Slifer and Yami is on the verge of death. However, Yugi and his friends arrive, and give Yami enough energy to summon The Winged Dragon of Ra, who destroys Diabound. However, time mysteriously reverses itself, resulting in Yugi and his friends not arriving, preventing the Pharaoh from summoning Ra, causing his defeat and disappearance, while Bakura gains the Millennium Pendant.
While on their search for criminals with strong Ka, Seto and Shada stop an angry mob from their assault on an innocent woman. Shada senses her powerful Ka (the Blue Eyes White Dragon) and Seto takes her back with them to the palace. It is later shown in a flashback that Seto and Kisara - the girl he rescued - had met before as children. Meanwhile, Aknadin is resting and has a flashback of what happened fifteen years ago: Aknadin created the Millennium Items at the cost of sacrificing the village of Kul Elna. It's also revealed that Aknadin is the younger brother of Aknamkanon, the previous Pharaoh, thus revealing that the Pharaoh and Seto are cousins. Now corrupted by Zorc, Aknadin's strongest wish is to see Seto rise to the throne as the new Pharaoh of Egypt. When he learns of Kisara's Ka, he is eager to have Seto extract it from her (and use it to usurp the Pharaoh), but Seto - out of his strong feelings for the girl - refuses. Aknadin then tells the two criminals that are battling to fight with Seto and Kisara instead, but Kisara's White Dragon ka kills both the criminals.
Eventually, Yugi and his friends meet up with Bobasa, who promises to help them. The High Priests and Yugi's group try looking for the Pharaoh. Meanwhile, Yami is in a cave, meeting Hasan, who leaves. Eventually, Atem reunites with his friends, but he, Mana, his childhood friend, and the High Priests leave for Kul Elna to defeat Bakura once and for all.
Bakura, surprised to see the Pharaoh alive, combats with Diabound, who is strengthened by the ghosts of the deceased villagers of Kul Elna, but Atem summons Mahad, the Dark Magician. Meanwhile, Shada attempts to destroy Diabound's tablet, but Aknadin knocks him unconscious. Eventually, the combined might of the Priests destroy Diabound. Aknadin also arrives with the Millennium Key, and somehow everyone freezes. Yami Bakura's voice also appears, and reduces the Thief King to sand. It is revealed that Yami Yugi and Yami Bakura are playing the Dark RPG. Yami Bakura's Master Items, his Hourglass Tokens, were the ones responsible of reversing time earlier and freezing time currently. Aknadin then takes all the High Priests' Millennium Items and inserts them into the Millennium Stone, causing Zorc Necrophades to be partially summoned. Aknadin then reveals himself to be Priest Seto's father, and his wish is to make Seto pharaoh. Zorc then transforms Aknadin into the Great Shadow Magus. The Great Shadow Magus then launches an attack on the Pharaoh, but Yami Yugi uses his Master Item, Hasan, to deflect the attack to Bakura's Master Item, the Hourglass Token, causing time to move again. Aknadin then takes Seto and teleports him to the palace.
Using the power of the Dark RPG, Yami Bakura revives the Thief King and Diabound, who splits all the Priests and Atem all over the village, who are attacked by bees and monsters. Karim sacrifices himself to destroy a monster, and all the Priests and the Pharaoh reunite. At the center of Kul Elna, Bakura and Diabound sacrifice themselves to summon Zorc Necrophades. Zorc then launches an attack on the Pharaoh, but Hasan takes the hit instead, resulting in Hasan's death. Atem then goes back to the palace to find Seto, while all the Priests wait there and prepare for Zorc's attack.
Meanwhile, Bobasa takes Yugi and his friends to the Valley of the Kings. Yugi, knowing all the traps, makes him and his friends safe from the traps. They are then one room away from the Pharaoh's name, which will make them defeat Zorc, but a fragment of Yami Bakura appears and challenges Yugi to a Duel.
At the palace, Aknadin attempts to extract Kiara's ka, the White Dragon, but Seto refuses. The Great Shadow Magus then kills Kisara, successfully taking her ka. Seto, enraged, murders Aknadin, but his soul possesses Seto. The Pharaoh and Seto Kaiba, who had entered the Memory World, arrives. Priest Seto, possessed by Aknadin, challenges Atem to a battle. During the battle, Aknadin uses the White Dragon, and almost defeats Atem, until the White Dragon destroys itself, and destroys Aknadin, freeing Priest Seto from his possession. Atem and Kaiba then go back to the place where Zorc will be attacking soon.
Meanwhile, during Yugi and Yami Bakura's Duel, Bakura uses a Lockdown/Mill strategy, and reduces Yugi's Deck to one card, but that card turned out to be "Gandora the Dragon of Destruction", ensuring Yugi's victory. They then arrive in the room with the Pharaoh's name, but the name is in hieroglyphics, which they cannot read, so they memorize the symbols.
At the palace, the army proves to be futile against Zorc, who proceeds to destroy the city. The Pharaoh then summons the Egyptian Gods, who seem to have destroyed Zorc, but Zorc survives the assault and destroys the Gods. Zorc launches an attack on the Pharaoh, but Shada takes the hit, resulting in his death. Isis, in an attempt to slow Zorc down, sacrifices herself. Shimon Muran also summons Exodia the Forbidden One, who is destroyed by Zorc, resulting in Shimon's death as well.
Yugi and his friends then arrive, who Summon Duel Monsters against Zorc, but are too weak to destroy it. When Zorc attempts to kill the Pharaoh and his modern-day friends, Shadi, from the present, possesses the deceased Hasan, who takes the hit instead, destroying Hasan and Shadi. Just then, Téa has an idea: She tells the group to visualize the hieroglyphics they saw onto the cartouche, then Atem reads out the name once it appears. While they are trying to visualize it, Zorc attempts to attack them, but Kaiba uses "Ring of Defense" to protect them. The Pharaoh then sees his name on the cartouche, and yells it: Atem. With this, he is able to summon The Creator of Light, who destroys Zorc with one light attack. With this, Yami Bakura is destroyed and Yami Yugi wins the Dark RPG, Atem has regained all of his memories. However, the Creator tells Atem and his friends that they have one more task to do.
Episodes[edit]
| Screenshot | Number | Names | Japanese air date | English air date | |
|---|---|---|---|---|---|
|
Episode 199 | 7 April 2004 | 15 October 2005 | ||
|
Episode 200 | 14 April 2004 | 22 October 2005 | ||
|
Episode 201 | 21 April 2004 | 29 October 2005 | ||
|
Episode 202 | 28 April 2004 | 5 November 2005 | ||
|
Episode 203 | 5 May 2004 | 12 November 2005 | ||
|
Episode 204 | 12 May 2004 | 19 November 2005 | ||
|
Episode 205 | 19 May 2004 | 26 November 2005 | ||
|
Episode 206 | 26 May 2004 | 3 December 2005 | ||
|
Episode 207 | 2 June 2004 | 10 December 2005 | ||
|
Episode 208 | 9 June 2004 | 17 December 2005 | ||
|
Episode 209 | 16 June 2004 | 7 January 2006 | ||
|
Episode 210 | 23 June 2004 | 14 January 2006 | ||
|
Episode 211 | 30 June 2004 | 21 January 2006 | ||
|
Episode 212 | 7 July 2004 | 28 January 2006 | ||
|
Episode 213 | 14 July 2004 | 4 February 2006 | ||
|
Episode 214 | 21 July 2004 | 1 April 2006 | ||
|
Episode 215 | 28 July 2004 | 8 April 2006 | ||
|
Episode 216 | 4 August 2004 | 15 April 2006 | ||
|
Episode 217 | 11 August 2004 | 22 April 2006 | ||
|
Episode 218 | 18 August 2004 | 29 April 2006 | ||
|
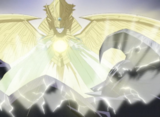
Episode 219 | 25 August 2004 | 6 May 2006 | ||
Featured Duels[edit]
| Duel # | Episode(s) | Duelist #1 | vs | Duelist #2 | Winner | LP #1 | LP #2 | Turns |
|---|---|---|---|---|---|---|---|---|
| 1 | 200 | Yami Bakura | vs. | Seto Kaiba | No Result | 1400 | 900 | 6 |
| 2 | 215-218 | Yugi Muto | vs. | Yami Bakura | Yugi Muto | 3100 | 0 | 17 |